Repairing holes in a kayak
Feb 20, 2014 2:13:33 GMT -1
Post by philpot on Feb 20, 2014 2:13:33 GMT -1
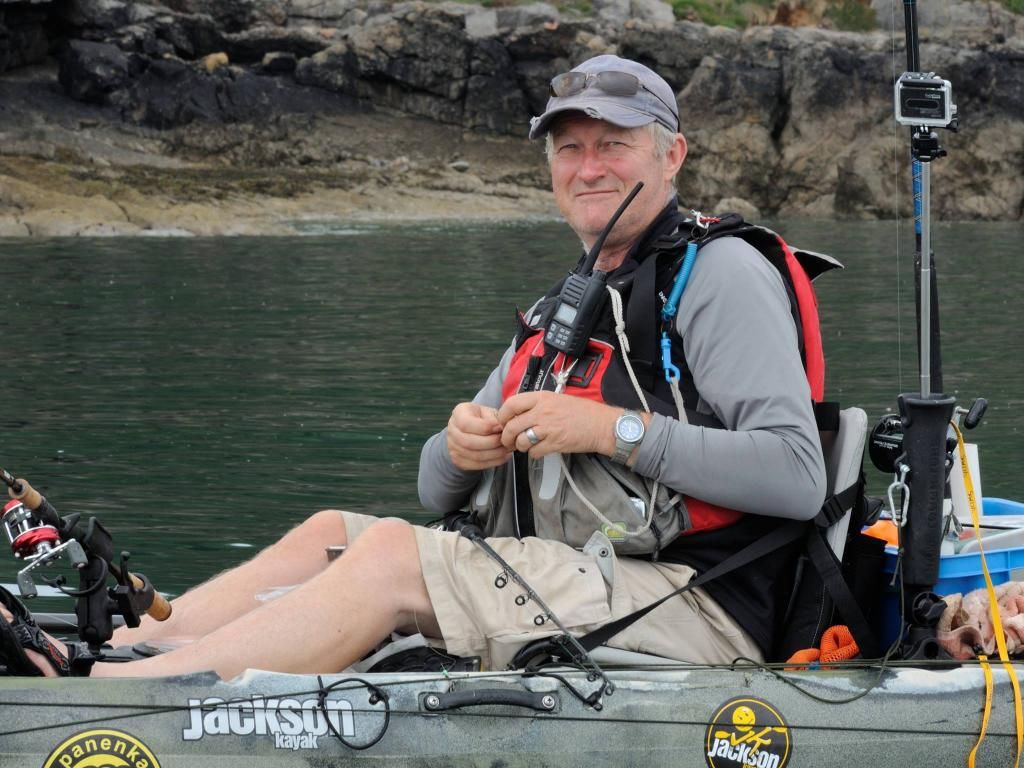
As I am selling my Big Game, I had to remove a number of items such as the Torqeedo outboard motor which left quite a few holes in the kayak. Now I could have just placed plastic bungs in the holes but instead I wanted to weld the holes so the kayak would be hole free again. I have in the past filled in the odd hole with a soldering iron but to be honest it is not a good way of tackling the job. A quick call to Zebra and we arranged a day to do the job as Terry is a very skilled hand at this job and I wanted to see just how it was done. I had my injections in order to cross from the Yorkshire boundry over to Lancashire  and arrived at Terry's house.
The first job was to remove any crud around the hole with an old chisel.
The tools for the job are a gas minature blow torch from Machine Mart

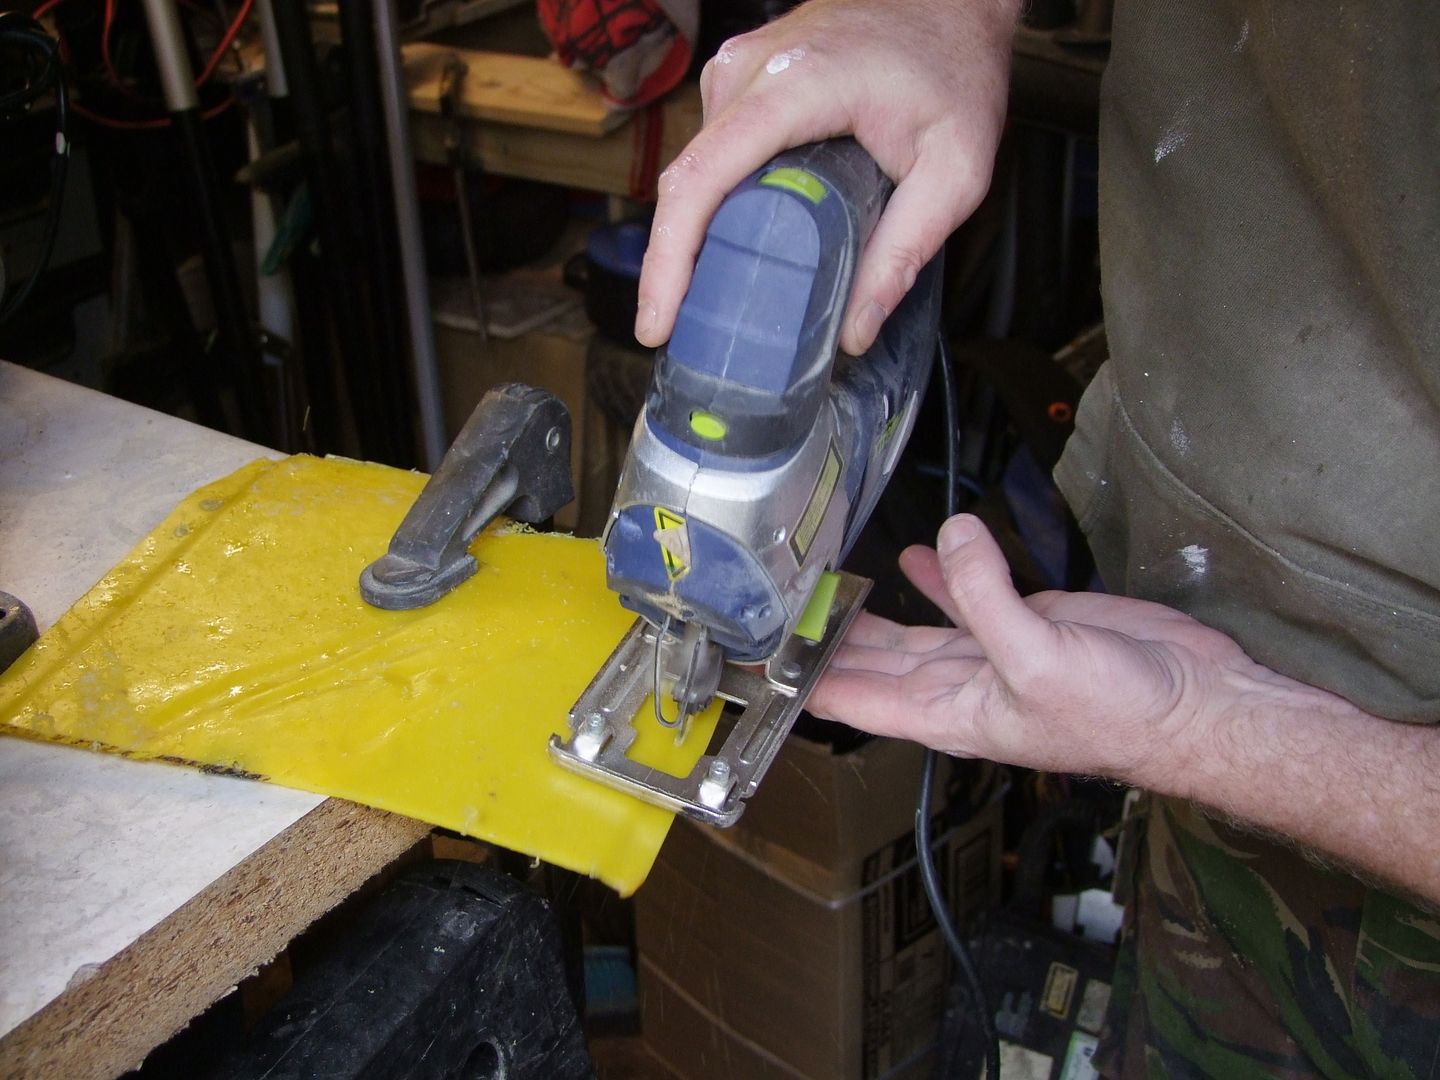
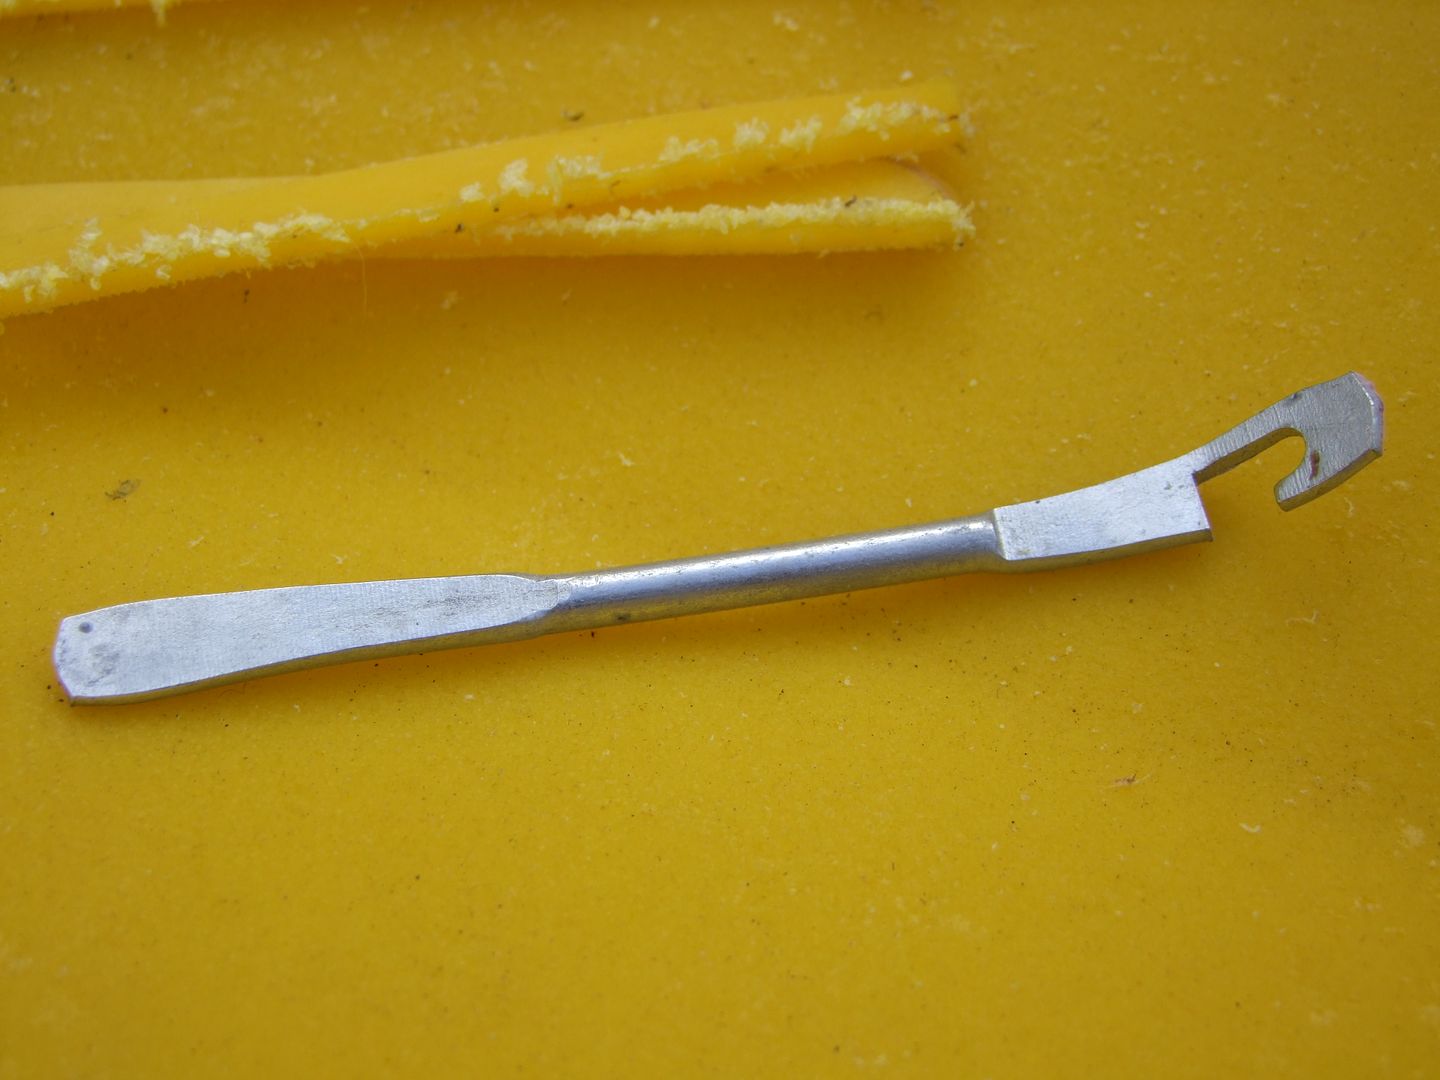
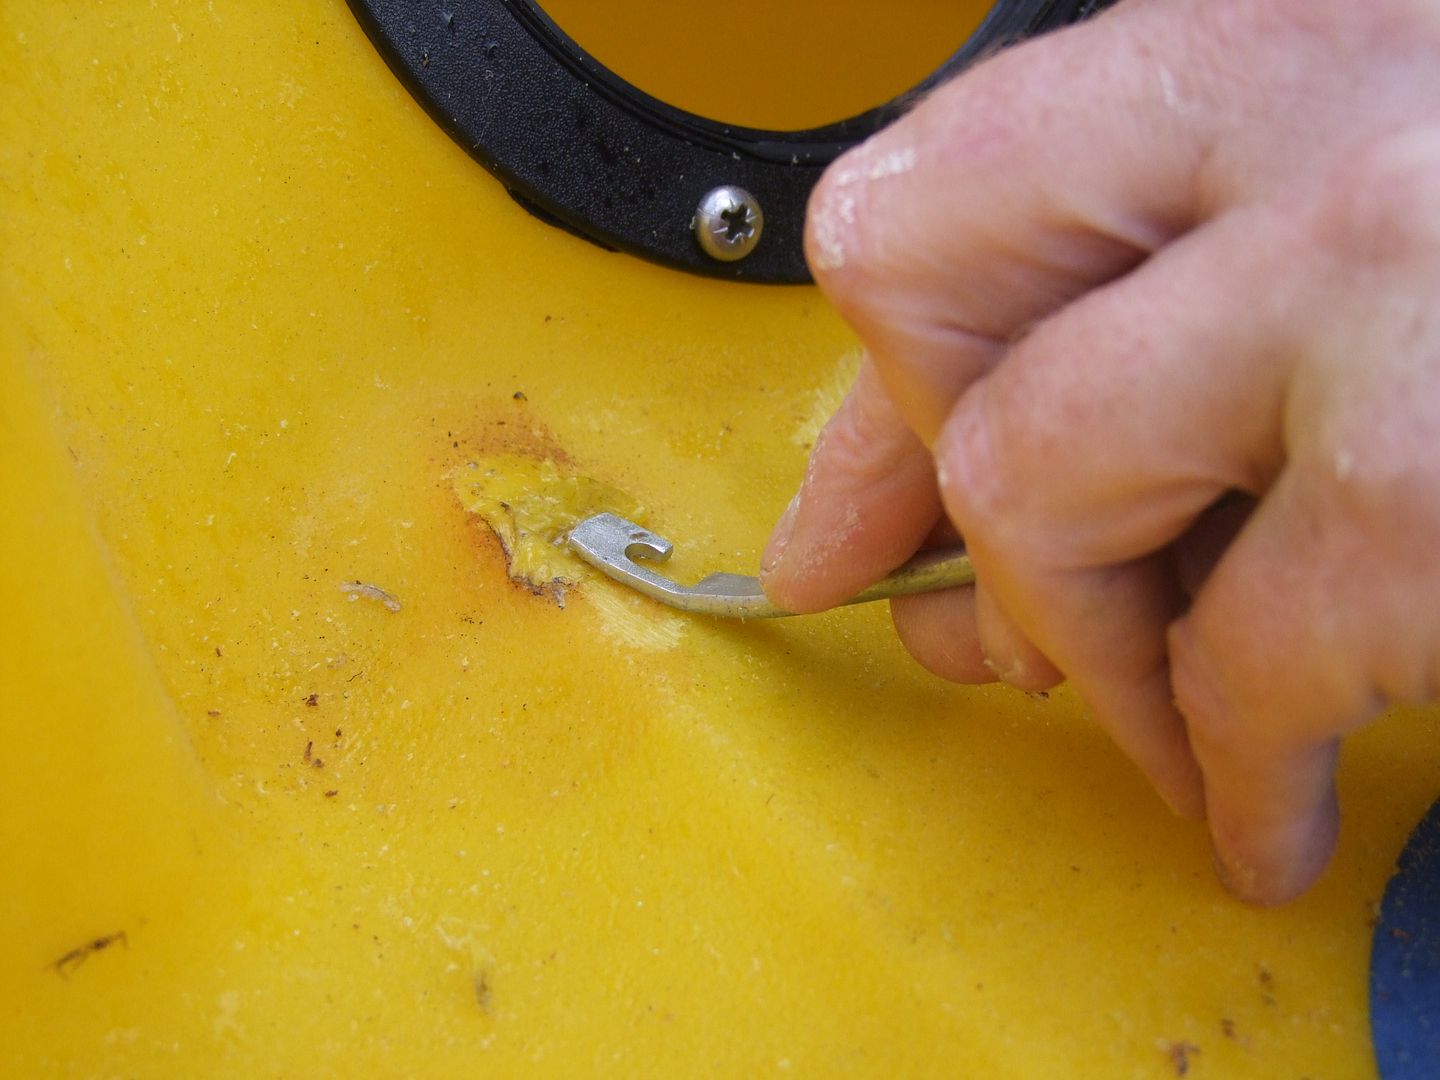
Strips of the plastic from the kayak, usually the remains from cutting a hatch or some modification, so never throw away waste plastic. A really handy tool is a push bike tyre lever to force the melted plastic into the hole.
The last tool is a power file, Terry uses a Black & Decker
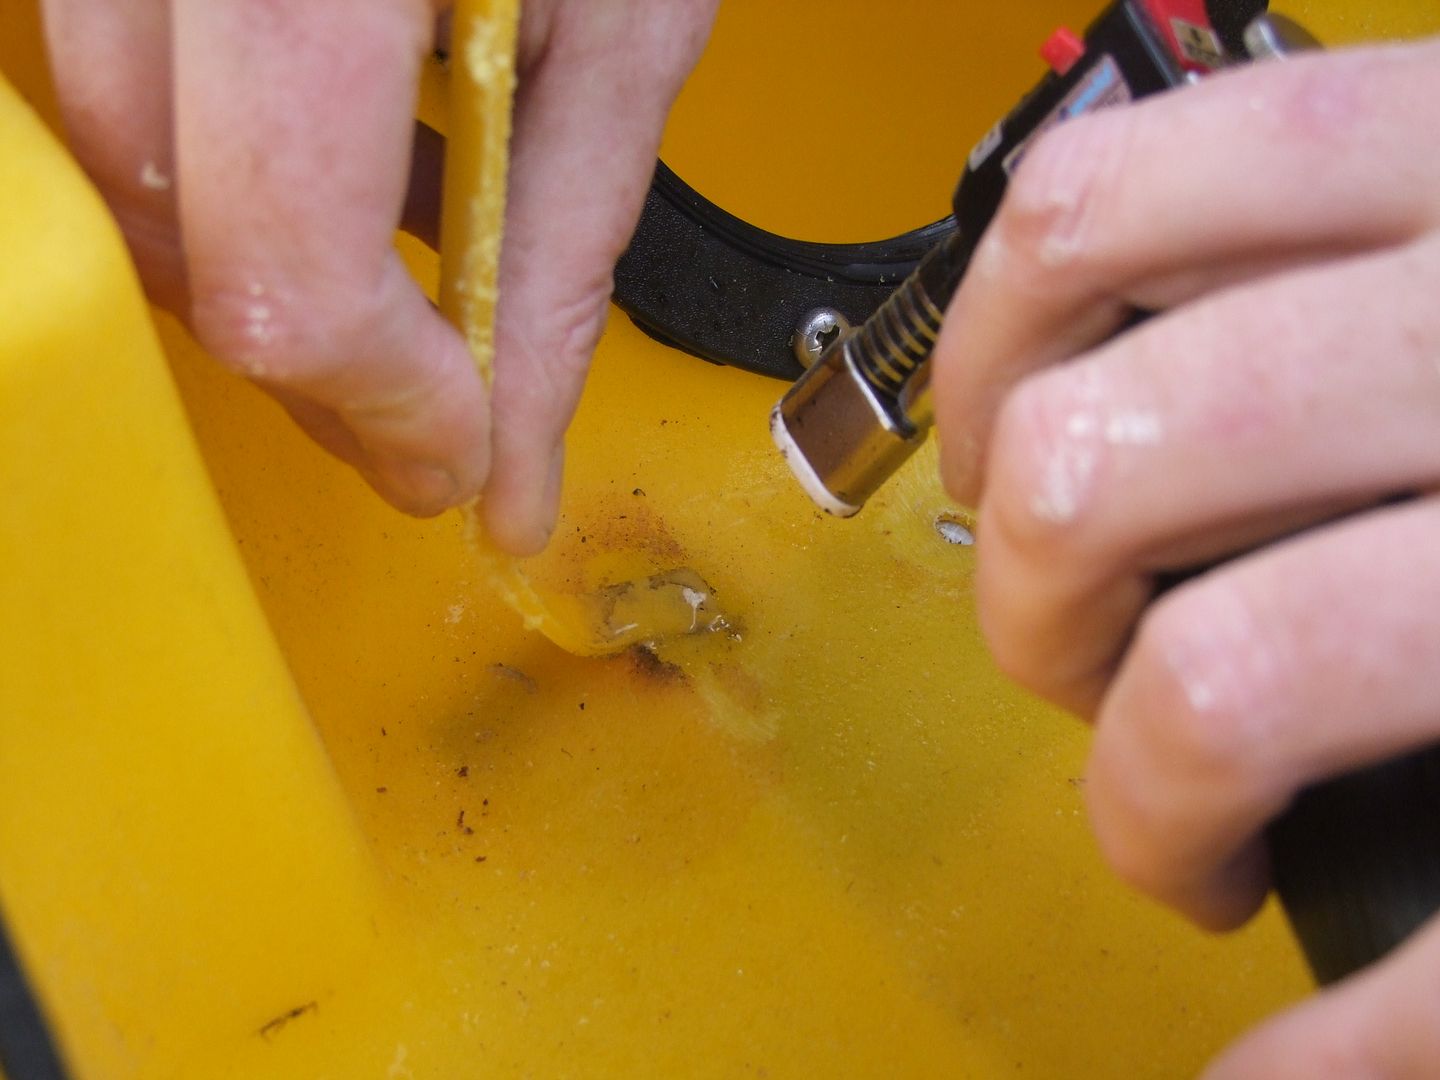
Once the main crud has been removed, the area around the hole needs a little touch with the power sander to finally clean the area to be welded. Heat from the blow torch is then applied to the waste strip of plastic, as soon as the plastic is starting to melt, apply heat carefully to the area around the hole. Immediately apply the melting plastic strip to the hole and using the tyre lever press the melted plastic into place. Do not try to push the plastic right into the hole to leave it perfectly flat as that will be taken care of after.
Now it is time to have a drink of coffee and let the welded plastic cool off for a minute or two before doing anything else. Okay with my ciggy now smoked, it was time to finish off the job.
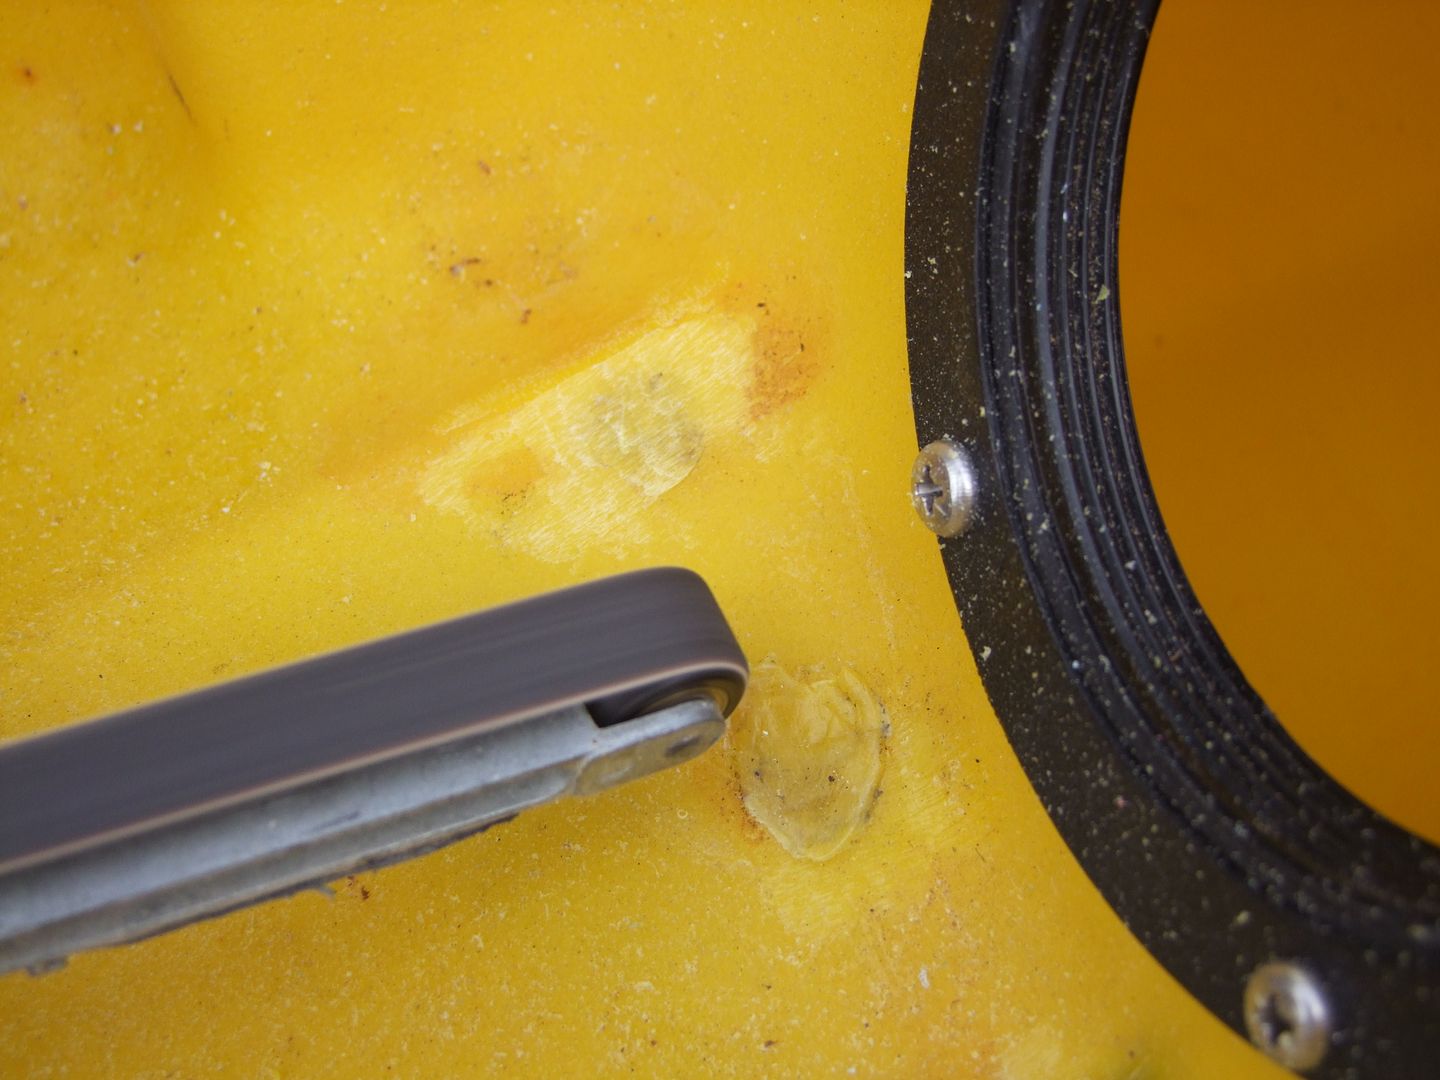
The plastic is now cool and there is a lump of uneven plastic in what was a hole which has to be removed. Again the power file is the tool for the job.
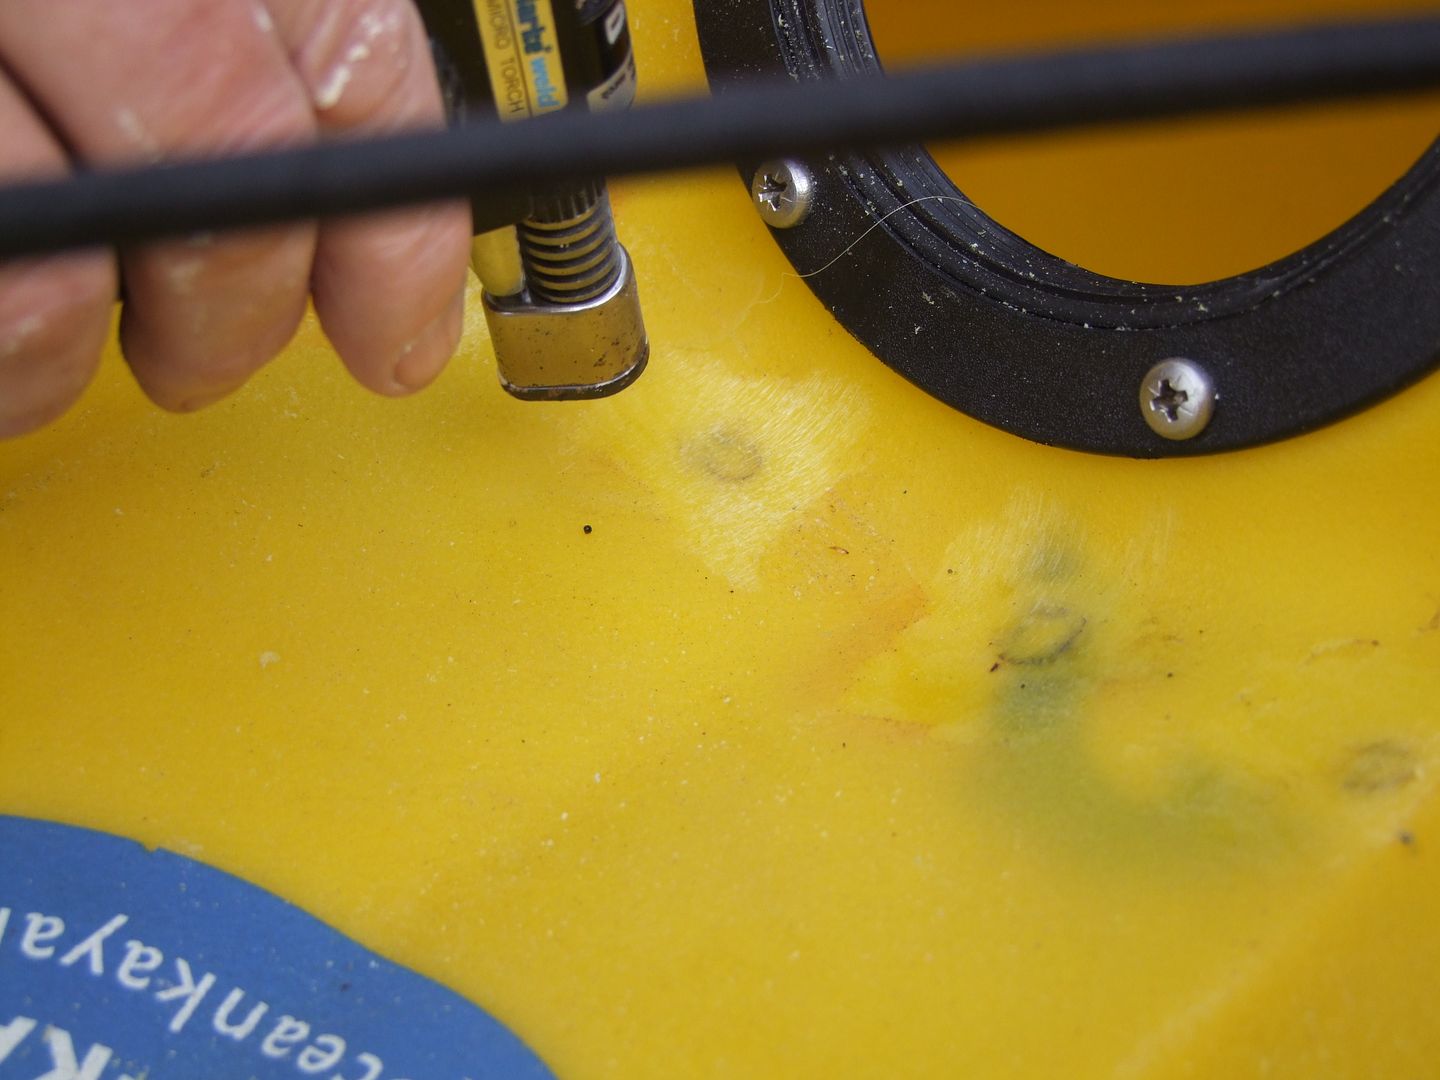
Once the plastic is now flat and sanded, it appears to be much paler than the rest of the kayak so the blow torch is gently applied to the sanded area and hey presto, the colour goes back to match the rest of the kayak.

Job done and my thanks to Terry. There is no doubt that despite knowing the method, it was so much easier to learn how to do the job when you actually see it being done and of course to do some of the repairs myself with Terry keeping a close eye on things. It is well worth having a practice on some scrap if you have any because it takes a little time to get the FEEL of the power file on plastic and the blow torch linked to the method. Too much heat applied to the kayak will cause the surface to 'sink' so care is needed. It is not rocket science but like many jobs, practice makes perfect.
It is always very usful to be able to get behind the area being welded so a piece of wood can be placed to support the plastic and stop too much melted plastic going through the hole but life is not so helpful. The one thing I would say to anyone who wants to do this sort of repair is to get the tools for the job and take your time, if you dont get the hole fixed at the first attempt, allow it to cool for a few minutes and apply more melted plastic, it is not going to be spot on every time but providing you take care, the result is not hard to get.
It is worth saying that the blow torch Terry uses is superb and is available for under £30 from Machine Mart and the power file from ebay around £40. Regarding the power file, the only two to consider are the Black and Decker and the Ferm as these are the only two that have no bulky bodywork around the sanding belt so you can see and get into tight areas.
These are the tools...
www.machinemart.co.uk/shop/product/details/cbt1-butane-gas-torch-kit?da=1&TC=SRC-blow%20torch
www.ebay.co.uk/itm/231010473702?_trksid=p2055119.m1438.l2649&ssPageName=STRK%3AMEBIDX%3AIT
www.ebay.co.uk/itm/271272306854?_trksid=p2055120.m1438.l2649&ssPageName=STRK%3AMEBIDX%3AIT
I know it is not so easy to see the work done on the photos due to the colour of the kayak and the contrast but I hope it clear enough for you.
Terry, please add anything I have missed.
Phil
 and arrived at Terry's house.
The first job was to remove any crud around the hole with an old chisel.
The tools for the job are a gas minature blow torch from Machine Mart

Strips of the plastic from the kayak, usually the remains from cutting a hatch or some modification, so never throw away waste plastic. A really handy tool is a push bike tyre lever to force the melted plastic into the hole.


The last tool is a power file, Terry uses a Black & Decker

Once the main crud has been removed, the area around the hole needs a little touch with the power sander to finally clean the area to be welded. Heat from the blow torch is then applied to the waste strip of plastic, as soon as the plastic is starting to melt, apply heat carefully to the area around the hole. Immediately apply the melting plastic strip to the hole and using the tyre lever press the melted plastic into place. Do not try to push the plastic right into the hole to leave it perfectly flat as that will be taken care of after.


Now it is time to have a drink of coffee and let the welded plastic cool off for a minute or two before doing anything else. Okay with my ciggy now smoked, it was time to finish off the job.
The plastic is now cool and there is a lump of uneven plastic in what was a hole which has to be removed. Again the power file is the tool for the job.

Once the plastic is now flat and sanded, it appears to be much paler than the rest of the kayak so the blow torch is gently applied to the sanded area and hey presto, the colour goes back to match the rest of the kayak.


Job done and my thanks to Terry. There is no doubt that despite knowing the method, it was so much easier to learn how to do the job when you actually see it being done and of course to do some of the repairs myself with Terry keeping a close eye on things. It is well worth having a practice on some scrap if you have any because it takes a little time to get the FEEL of the power file on plastic and the blow torch linked to the method. Too much heat applied to the kayak will cause the surface to 'sink' so care is needed. It is not rocket science but like many jobs, practice makes perfect.
It is always very usful to be able to get behind the area being welded so a piece of wood can be placed to support the plastic and stop too much melted plastic going through the hole but life is not so helpful. The one thing I would say to anyone who wants to do this sort of repair is to get the tools for the job and take your time, if you dont get the hole fixed at the first attempt, allow it to cool for a few minutes and apply more melted plastic, it is not going to be spot on every time but providing you take care, the result is not hard to get.
It is worth saying that the blow torch Terry uses is superb and is available for under £30 from Machine Mart and the power file from ebay around £40. Regarding the power file, the only two to consider are the Black and Decker and the Ferm as these are the only two that have no bulky bodywork around the sanding belt so you can see and get into tight areas.
These are the tools...
www.machinemart.co.uk/shop/product/details/cbt1-butane-gas-torch-kit?da=1&TC=SRC-blow%20torch
www.ebay.co.uk/itm/231010473702?_trksid=p2055119.m1438.l2649&ssPageName=STRK%3AMEBIDX%3AIT
www.ebay.co.uk/itm/271272306854?_trksid=p2055120.m1438.l2649&ssPageName=STRK%3AMEBIDX%3AIT
I know it is not so easy to see the work done on the photos due to the colour of the kayak and the contrast but I hope it clear enough for you.
Terry, please add anything I have missed.
Phil