|
|
Post by ZEBRA on Mar 27, 2010 20:45:07 GMT -1
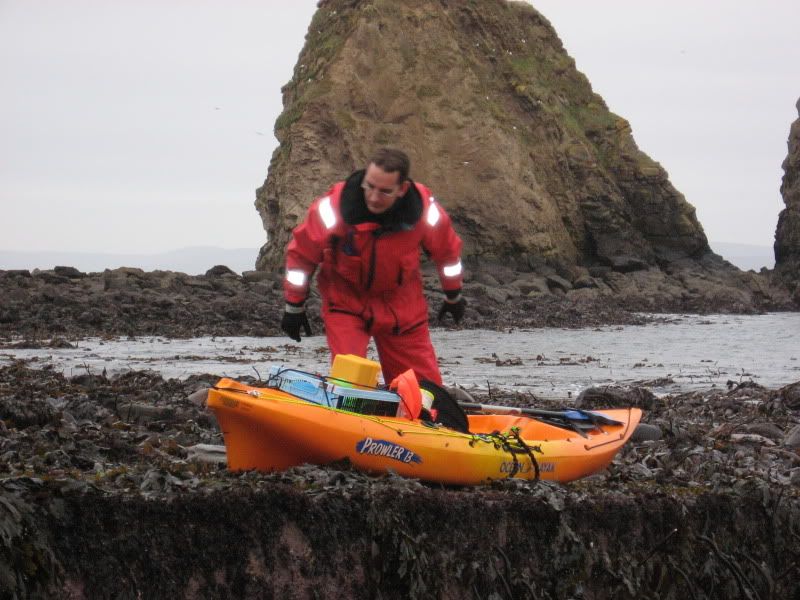
just a quick update to the new restoration projects .   The main modifications. The hulls were scraped and all deep scratches tidied up. The front ballast was removed this is a big slab of Styrofoam the problem with the front Styrofoam is it adds a lot of buoyancy to the kayak at the front so the kayak sits higher in the water and tended to skeet rather than glide and less stable though it won’t sink. Buy removing the front buoyancy the angle of the kayak is altered so the front sits much lower helping the glide of the yak and making it more responsive. they have turned out really nice kayaks and great projects to play with . |
|
empee
valued Member

Posts: 176
|
Post by empee on Mar 27, 2010 22:42:37 GMT -1
I must be reading that wrong Terry - surely the foam can't affect the buoyancy unless the kayak floods - otherwise it's only effect is to add it's weight as ballast? (unless the buoyancy was on the outside...)
|
|
|
|
Post by ZEBRA on Mar 27, 2010 23:18:42 GMT -1
just me not explaining it properly martin  the buoyancy foam was right along the kayak inside in the center it was quite thick so you could not get your legs and feet right forward and down so instead of your weight being spread evenly from your bum to your feet all the weight was on your bum by removing the buoyant foam bit you can get your feet and legs in a better position and the weight is transfered more evenly on the footrests so there is a bit more weight at the front making it sit better |
|
empee
valued Member
Posts: 176
|
Post by empee on Mar 27, 2010 23:31:02 GMT -1
aaahh! ;D
|
|
cofi
new member
Posts: 8
|
Post by cofi on Jun 4, 2010 11:59:07 GMT -1
Your red project look very good, are you going to paint the white ones,
I'm not sure if i can ask questions here;
I've just bought an old Pyranha master (sit in), I'm thinking of adding deck lines as it doesn't have any at the moment and also rather ambitiously a surface mounted rod holder either behind or in front of the seat. Can you tell me please did you get your deck line and attachments locally, Any advice on the rod holder gratefully appreciated.
Thanks
|
|
cofi
new member
Posts: 8
|
Post by cofi on Jun 4, 2010 12:04:16 GMT -1
Opps Sorry,
I didn't realise there was a second page. It's farily obvious I'm a complete novice at this stuff,
No offence
|
|
|
|
Post by ZEBRA on Jun 4, 2010 13:36:45 GMT -1
no problem at all cofi i got all the fittings from h20 kayaks . i would add a flush mount to the front of the kayak like the feel free ones they are quite small and ideal for the job . www.h2okayaks.com/engine/shop/index.htmlthe white ones were not painted just the front and back i used a marine grade black gloss for this just to add a little protection to them . changing the handles and adding the deck lines took about 15 mins to complets the longest bit was sanding out the bad scratches on the hull and then just very gently touching it all with a mini blow lamp to remove any small bits .they turned out to be very good kayaks in the end . |
|
cofi
new member
Posts: 8
|
Post by cofi on Jun 5, 2010 7:40:35 GMT -1
Thanks for the info, I'll check the web link.
My kayak had a depression just forward of the seat,
I was advised to put boiling water from a kettle on the area and put a sand bag there. i tried it but after removing the sand bag it reverted back by the morning.
so I stuffed a basketball and a rugby ball wedged them together to push the depression out, turned the kayak upside down then poured 4-5 kettle's of boiling water on the area; it seems to have worked.
The hull has a few deep scrathches so I'll try do something similar to you on the hull.
I'll have a go at the deck lines this week.
|
|
|
|
Post by THURSOMAN on Jun 9, 2010 9:23:14 GMT -1
Hi cofi great to see you getting involved with your posts.  What an interesting way to sort out your depression on the kayak. Will be very interested on how you get on with those scratches and deck lines.  Chris |
|
boz
valued Member

Posts: 19
|
Post by boz on Jun 24, 2010 21:10:15 GMT -1
What a brilliant result Terry. Well done. I've just aquired a similar sit inside myself, which is probably, from the 1970's Its the same colour and has the same gaffer tape as well, but seems to be in better condition from the one you restored. I'm hoping to get round to restoring it over the winter, and this post has given me inspiration, as well as ideas and info, on how to manage the job. Thanks very much Dave |
|


 the buoyancy foam was right along the kayak inside in the center it was quite thick so you could not get your legs and feet right forward and down so instead of your weight being spread evenly from your bum to your feet all the weight was on your bum by removing the buoyant foam bit you can get your feet and legs in a better position and the weight is transfered more evenly on the footrests so there is a bit more weight at the front making it sit better