h20 anchor trolly on the mazzif fisha
Jan 27, 2012 19:48:03 GMT -1
Post by ZEBRA on Jan 27, 2012 19:48:03 GMT -1
h20 anchor trolly on the mazzif fisha
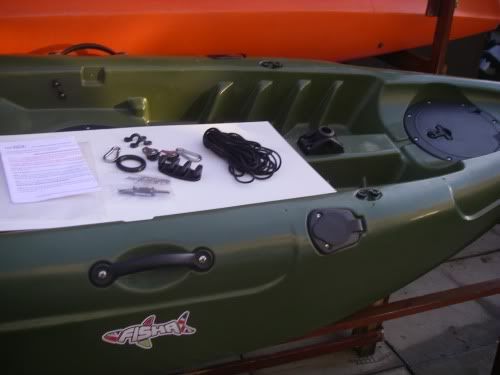
With a break in the weather I decided it was time to fit the h20 anchor trolley kit to the mazzif fisha
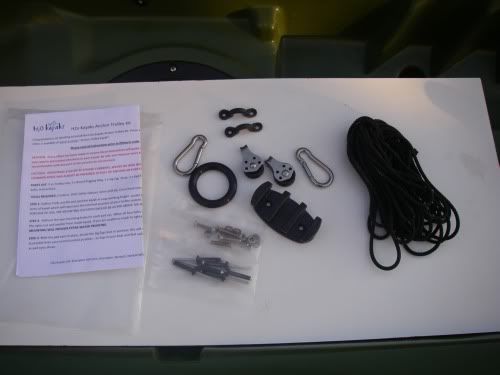
To start with I laid all the parts out from the kit on a flat board in the kayak
I decided against using the ring method of fitting instead opting to use the carabineer
Method the great thing about using this kit is it has everything included to allow several different methods to be used.
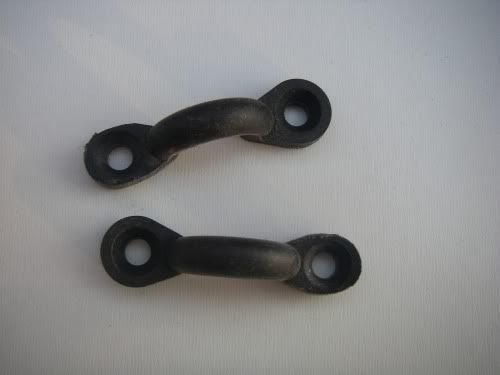
First thing was to slightly shave down the pad eyes on one side.
using a sander the pad eye was just rubbed along the grit
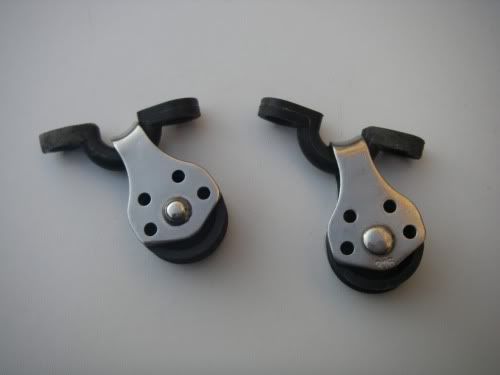
By slightly sanding one side of the pad eye it allows the pulley to easily slide over the slightly narrowed end
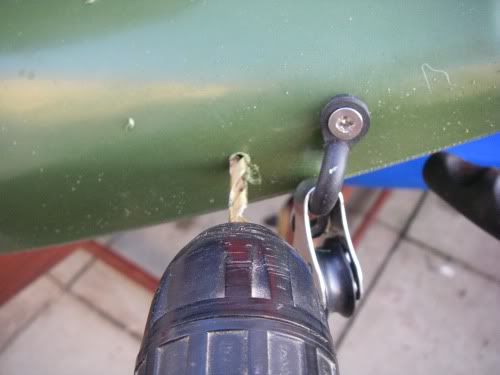
using a battery powered drill the pad eye's and pulley's are fitted using the supplied nuts and bolts.
one of the great things about the mazzif fisha is the large hatches these allowed easy access to the inside of the kayak during fitting of the anchor trolley

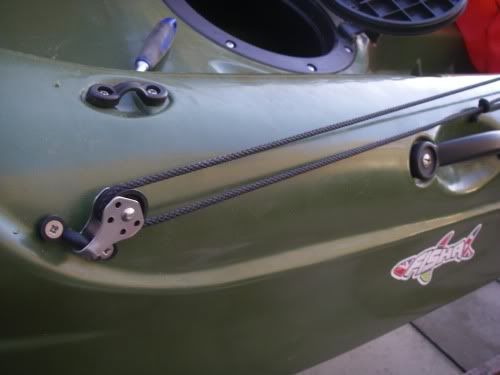
The line anchor trolley rope is then threaded through the pulley blocks on both the front and back of the trolley.
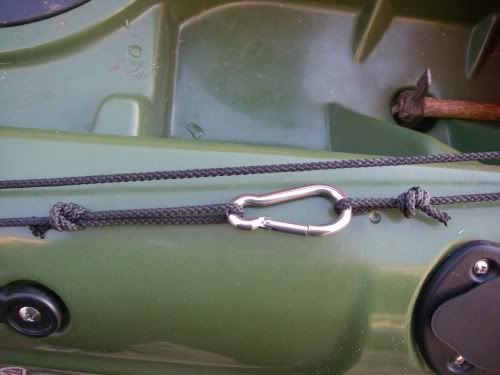
One of the supplied carabineers was then used as the anchor link this allows the anchor line to be clipped in and out quickly without any chance of tangling
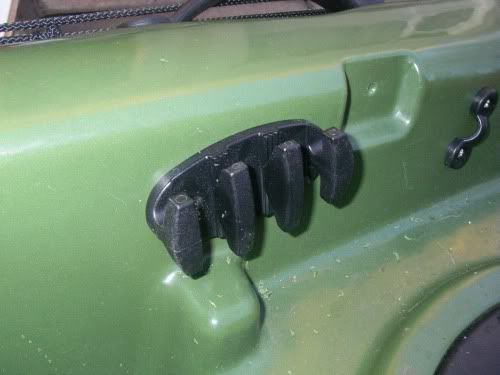
The last thing in the kit to be fitted is the zig zag cleat this was installed on the inside of the gunwale in an easy to reach position
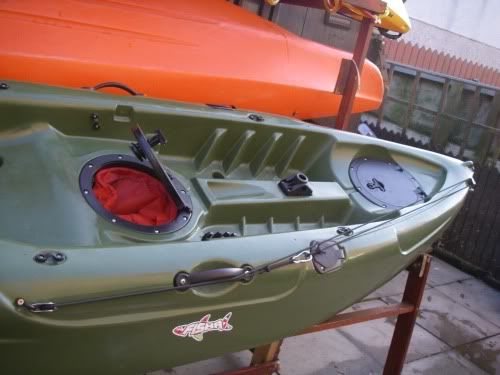
Once fitted the anchor trolley is just clipped under the side handle during transport and un-clipped once needed out on the water.
the total time for this fitting was about 10 mins it was made easy because of the easy access to the inside of the mazzif kayak and the superb comprehensive anchor trolley kit from h20
With a break in the weather I decided it was time to fit the h20 anchor trolley kit to the mazzif fisha
To start with I laid all the parts out from the kit on a flat board in the kayak
I decided against using the ring method of fitting instead opting to use the carabineer
Method the great thing about using this kit is it has everything included to allow several different methods to be used.
First thing was to slightly shave down the pad eyes on one side.
using a sander the pad eye was just rubbed along the grit
By slightly sanding one side of the pad eye it allows the pulley to easily slide over the slightly narrowed end
using a battery powered drill the pad eye's and pulley's are fitted using the supplied nuts and bolts.
one of the great things about the mazzif fisha is the large hatches these allowed easy access to the inside of the kayak during fitting of the anchor trolley
The line anchor trolley rope is then threaded through the pulley blocks on both the front and back of the trolley.
One of the supplied carabineers was then used as the anchor link this allows the anchor line to be clipped in and out quickly without any chance of tangling
The last thing in the kit to be fitted is the zig zag cleat this was installed on the inside of the gunwale in an easy to reach position
Once fitted the anchor trolley is just clipped under the side handle during transport and un-clipped once needed out on the water.
the total time for this fitting was about 10 mins it was made easy because of the easy access to the inside of the mazzif kayak and the superb comprehensive anchor trolley kit from h20