Waterproof cable seal for FF
Feb 13, 2012 20:55:11 GMT -1
Post by philpot on Feb 13, 2012 20:55:11 GMT -1
Now being originally from Yorkshire, I don't like to pay through the nose for anything and when it came to the first time I had to fit a fishfinder, I was stumped for a little while because I looked at marine glands and the £20-25 price tag--------NO WAY. Apart from it being a really ugly item, I decided to design my own. I have used this method now on 4 occasions with no leaks.
It is quick and easy to make and costs pence. To start with you will need to call in at a double glazing shop and buy or scrounge a piece of plastic window sill. A piece 18" long would make you about 20 seals so any offcut will do.
First job is to drill/cut the hole to pass your cables and plugs through. Cut a piece of sill approx 50mm x 50mm with either a wood saw or craft knife. Drill two holes for the cables to pass through, I used 5mm drill.

Then with a sharp knife, cut straight through the plastic and across the holes so that you have two halves.

The plastic is then super glued on the edge that has been cut. Trap the cables into the drilled recesses and rejoin the plastic back together. Joining time is about 1min.

Leave to go off for about 5mins. Now apply a good ring of Sikaflex 291i ( or the sealing compound of your choice but not silicone as it takes too long to cure ) just a little larger than the hole in the kayak where the wires are going

Now feed the cables through the hole and with care position the plastic on the inside of the hole, pushing gently but firmly into place so that you start to see the sealant to the edge of the hole. It is important not to get sikaflex on the cables as you will need to be able to slide the cables to the correct final position.

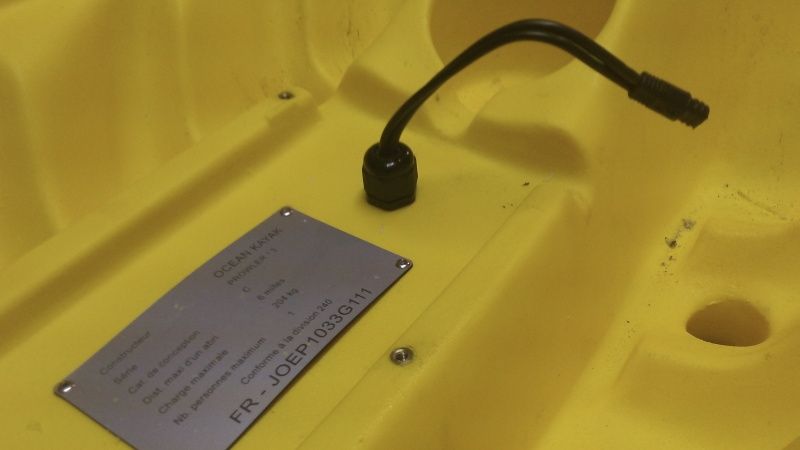
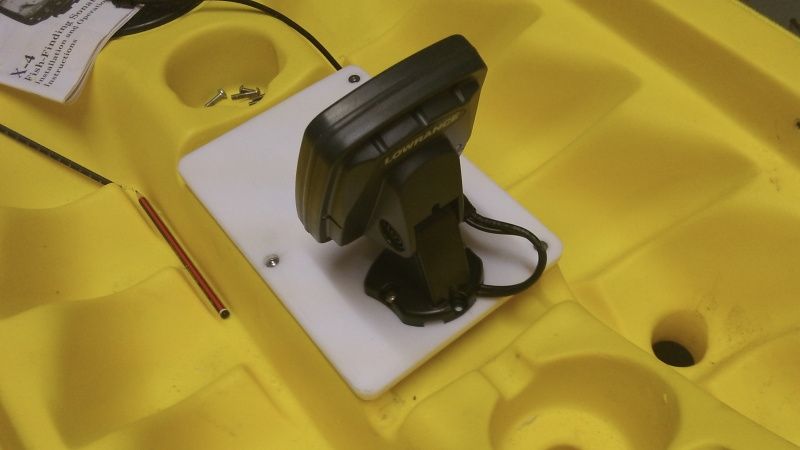
You can now check how much cable you need sticking out of the hole in order to connect to the FF. In this case I am going through the bottom of my Big Game centre pod and up through the pod cover.

When you have sorted the cables for position and length, take a rubber electrical grommet and using a leather punch ( or drill ) produce too holes in the middle as near as possible to match the holes with the cables running through. Then with a sharp knife cut through the grommet from one hole straight across to the other side.

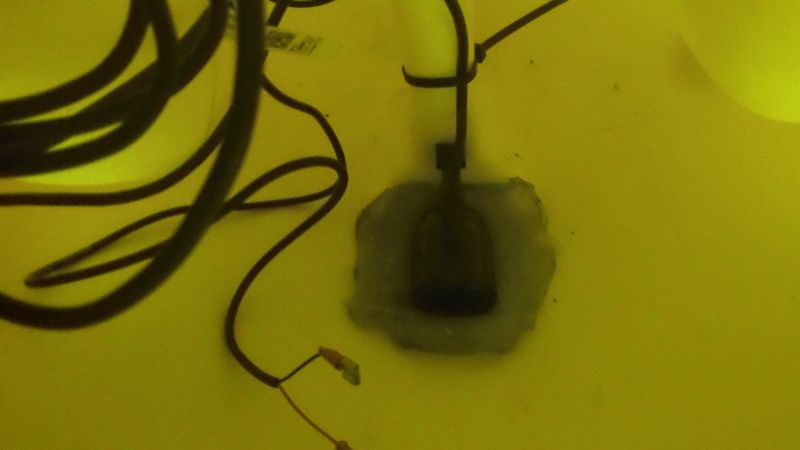
At this point I tend to leave the everything to cure overnight but you can finish the job off if you wish. Squeeze more Sikaflex into the recess now created buy the plastic plate inside the hull but not too much otherwise when you place the grommet into position the Sikaflex will squirt out all over the place. Ensure at this stage that the cables are sealed with Sikaflex. Open the rubber grommet around the cables and seat into the recess.

The end result is neat, waterproof and very cheap. Please note that in the last photo I have not sealed the grommet in place as I have more work to do on the pod cover so I don't want to commit the cables to a final position as yet but you can see how it sits. One other point, use electricians tape to hold the grommet in position overnight while it cures. Remember that you will see a slight crack in the grommet but of course the area below the grommet is full of sealant so water will not get in.
Phil
It is quick and easy to make and costs pence. To start with you will need to call in at a double glazing shop and buy or scrounge a piece of plastic window sill. A piece 18" long would make you about 20 seals so any offcut will do.
First job is to drill/cut the hole to pass your cables and plugs through. Cut a piece of sill approx 50mm x 50mm with either a wood saw or craft knife. Drill two holes for the cables to pass through, I used 5mm drill.
Then with a sharp knife, cut straight through the plastic and across the holes so that you have two halves.
The plastic is then super glued on the edge that has been cut. Trap the cables into the drilled recesses and rejoin the plastic back together. Joining time is about 1min.
Leave to go off for about 5mins. Now apply a good ring of Sikaflex 291i ( or the sealing compound of your choice but not silicone as it takes too long to cure ) just a little larger than the hole in the kayak where the wires are going
Now feed the cables through the hole and with care position the plastic on the inside of the hole, pushing gently but firmly into place so that you start to see the sealant to the edge of the hole. It is important not to get sikaflex on the cables as you will need to be able to slide the cables to the correct final position.
You can now check how much cable you need sticking out of the hole in order to connect to the FF. In this case I am going through the bottom of my Big Game centre pod and up through the pod cover.
When you have sorted the cables for position and length, take a rubber electrical grommet and using a leather punch ( or drill ) produce too holes in the middle as near as possible to match the holes with the cables running through. Then with a sharp knife cut through the grommet from one hole straight across to the other side.
At this point I tend to leave the everything to cure overnight but you can finish the job off if you wish. Squeeze more Sikaflex into the recess now created buy the plastic plate inside the hull but not too much otherwise when you place the grommet into position the Sikaflex will squirt out all over the place. Ensure at this stage that the cables are sealed with Sikaflex. Open the rubber grommet around the cables and seat into the recess.
The end result is neat, waterproof and very cheap. Please note that in the last photo I have not sealed the grommet in place as I have more work to do on the pod cover so I don't want to commit the cables to a final position as yet but you can see how it sits. One other point, use electricians tape to hold the grommet in position overnight while it cures. Remember that you will see a slight crack in the grommet but of course the area below the grommet is full of sealant so water will not get in.
Phil