fitting a mazzif hatch
Feb 21, 2012 21:15:59 GMT -1
Post by ZEBRA on Feb 21, 2012 21:15:59 GMT -1
fitting a mazzif hatch
fitting a mazzif hatch to a fat yak kaafu
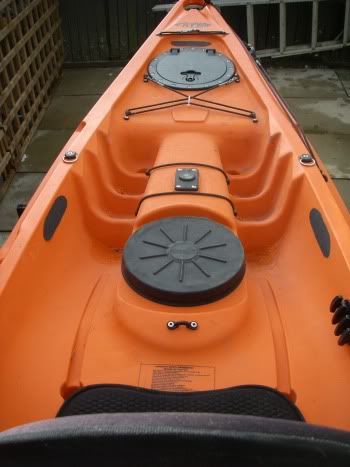
it was decided that replacing the molded in rubber front hatch on the fat yak would give a little more access space i also like to tuck my paddle blade under the bungee on the front of the kayak while i am drift fishing this gives me quick access to the paddle at the end of each drift the fat yak has 2 built in hatches with rubber covers but both hatch rims protrude a little making it a little awkward when tucking in my paddle blade at the front so the mazzif replacement hatch will sit flush and eliminate this problem for me .
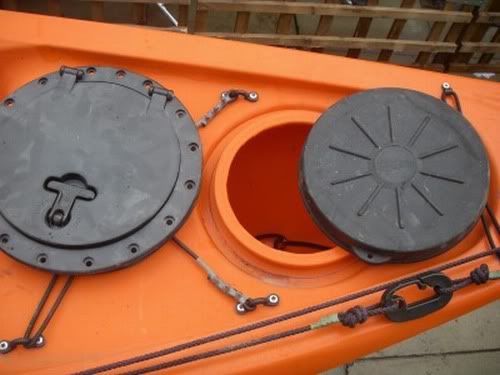
as you can see both hatch covers here are not that much difference in size only about an inch but 1 will flush mount so first thing is to check the mazzif hatch and see if i have enough Clarence for the hatch frame to be fitted
a nice easy way to do this is with the rubber seal that is supplied with the mazzif hatch
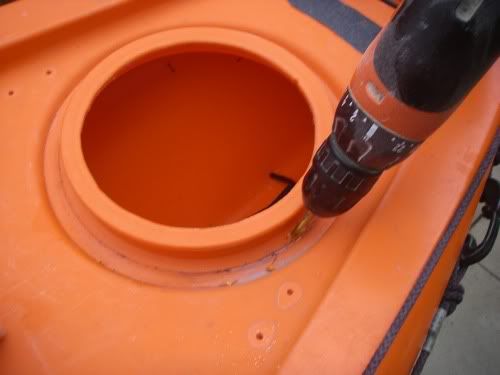
next step is my first cut taking the time to mark out the cut its a little smaller than needed allowing me to adjust the hole for the final fit with a drill a small hole was drilled to allow the jig saw blade to fit inside and start the cut
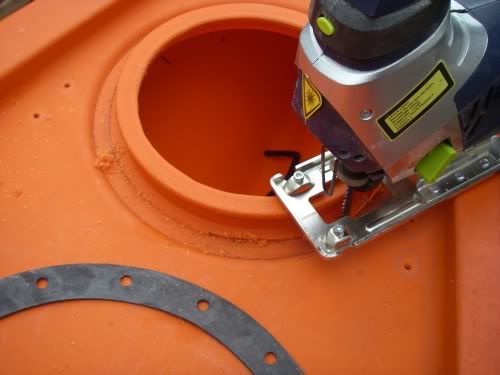
taking plenty of time and not rushing the cut the first cut out was made
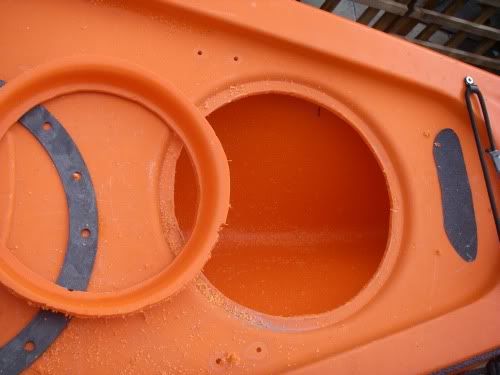
the edges cleaned off with a bit of sand paper all ready for the final marking and cut

i used an indelible black ink pen to make the final precise markings of the final cut ready for the jigsaw .
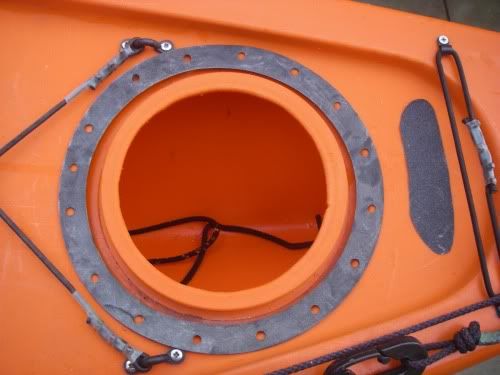
an electric file just to finish of the cut out and clean the edges its a bigger hole than i thought it would be but the new hatch fits just right
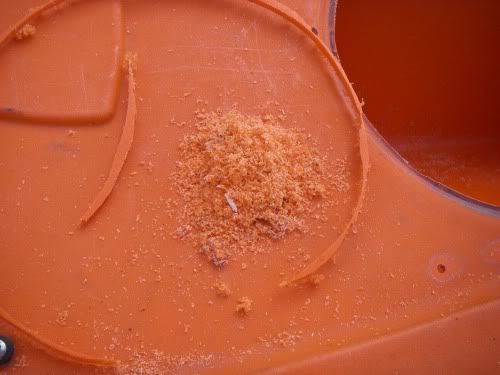
don't throw away the loose shavings and extra bits of waste plastic keep them in a bag they are the exact color and plastic type if you need to fill in any holes in the future so they are very handy to keep
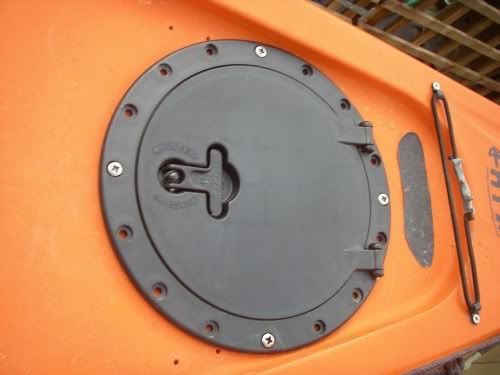
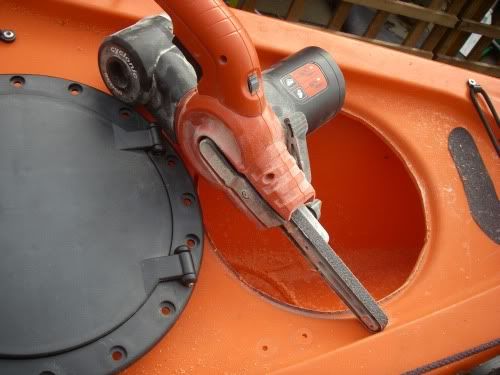
the hatch and its rubber seal was then carefully pushed in to place and 4 even bolt holes were drilled and nuts and bolts fitted this keeps it all nice in place and ready for the rest of the bolts to be drilled and fitted
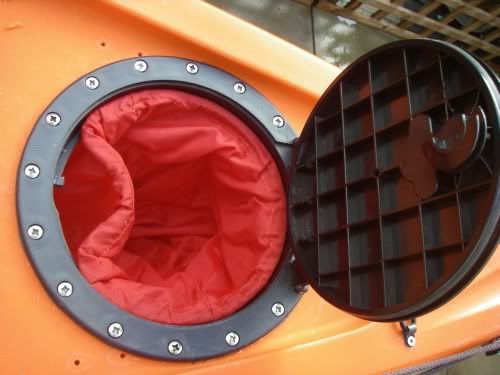
with the rest of the nuts and bolts fitted using washers on the inside all was tightened up and the supplied inner bag was fitted
the job took about half hour and has achieved the flush mount i needed on the front hatch its a neat job and well worth doing the inner bag easily removes giving full access to the inner hull should i need it
fitting a mazzif hatch to a fat yak kaafu
it was decided that replacing the molded in rubber front hatch on the fat yak would give a little more access space i also like to tuck my paddle blade under the bungee on the front of the kayak while i am drift fishing this gives me quick access to the paddle at the end of each drift the fat yak has 2 built in hatches with rubber covers but both hatch rims protrude a little making it a little awkward when tucking in my paddle blade at the front so the mazzif replacement hatch will sit flush and eliminate this problem for me .
as you can see both hatch covers here are not that much difference in size only about an inch but 1 will flush mount so first thing is to check the mazzif hatch and see if i have enough Clarence for the hatch frame to be fitted
a nice easy way to do this is with the rubber seal that is supplied with the mazzif hatch
next step is my first cut taking the time to mark out the cut its a little smaller than needed allowing me to adjust the hole for the final fit with a drill a small hole was drilled to allow the jig saw blade to fit inside and start the cut
taking plenty of time and not rushing the cut the first cut out was made
the edges cleaned off with a bit of sand paper all ready for the final marking and cut
i used an indelible black ink pen to make the final precise markings of the final cut ready for the jigsaw .
an electric file just to finish of the cut out and clean the edges its a bigger hole than i thought it would be
 but the new hatch fits just right
don't throw away the loose shavings and extra bits of waste plastic keep them in a bag they are the exact color and plastic type if you need to fill in any holes in the future so they are very handy to keep
the hatch and its rubber seal was then carefully pushed in to place and 4 even bolt holes were drilled and nuts and bolts fitted this keeps it all nice in place and ready for the rest of the bolts to be drilled and fitted
with the rest of the nuts and bolts fitted using washers on the inside all was tightened up and the supplied inner bag was fitted
the job took about half hour and has achieved the flush mount i needed on the front hatch its a neat job and well worth doing the inner bag easily removes giving full access to the inner hull should i need it