Ocean Kayak Trident Review
Sept 19, 2007 20:56:59 GMT -1
Post by snapper on Sept 19, 2007 20:56:59 GMT -1
The Trident Part One.
I read this book recently that had on the back the text: “Five red cars means it’s going to be a SUPER GOOD DAY.” I wasn’t quite sure what that meant until today - today being the day that a brand-spanking-new yellow Trident came home with me.
I’d read the forums and looked at the photographs and so on and decided that I would start a thread on mine, from the start until, well, whenever it’s finished. So let us start at the beginning:
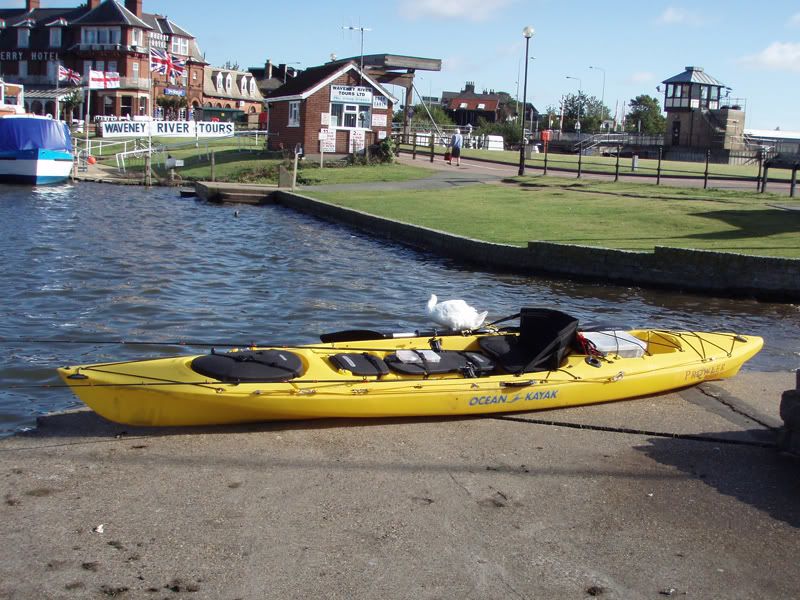
Just like Christmas, a parcel, all wrapped up, was lying on the floor for my attention. A 15ft long parcel. A couple of minutes later and this was all on the floor around it and I got my first real view of a Trident. It was love at first sight! Initial thoughts were that it looked solid, purposeful and well thought out. Closer examination brought out even more extra details and I realised that it wasn’t another kayak that had been turned into an angler edition by merely adding some flush mounts but something that had actually been designed for the sole purpose of being used for chasing fish all day long, comfortably, ergonomically, safely and thoughtfully. It just looked ‘right’. Once safely strapped to my roof bars it was time to see how it handled being driven as I took it home on the dual carriageway, slowly increasing in speed to 70mph or so – steady as a rock, no flexing or additional noise. It passed the first test and I’d happily go on a decent run with it on the roof.
Back home I grabbed a C-Tug, a PFD and my camera and unstrapped it from the roofbars, proper reviewing starts here.
Immediately noticeable was the weight – officially 1.8kg more than the Prowler 15 Anglers I’m used to, weighing in at 27.2 KG’s (60lbs instead of 54lbs in old money). I’m no nine-stone weakling but no weight-lifter either and I’d say that the average man in the street would be quite able to car top it solo, but it’d take effort. That said, the load balance seemed better spread than the 15 and it was easy enough to manoeuvre.
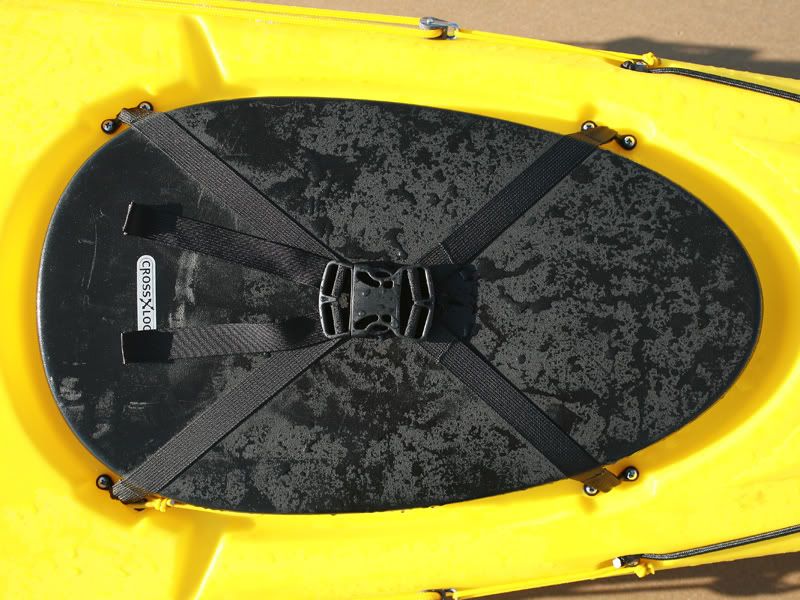
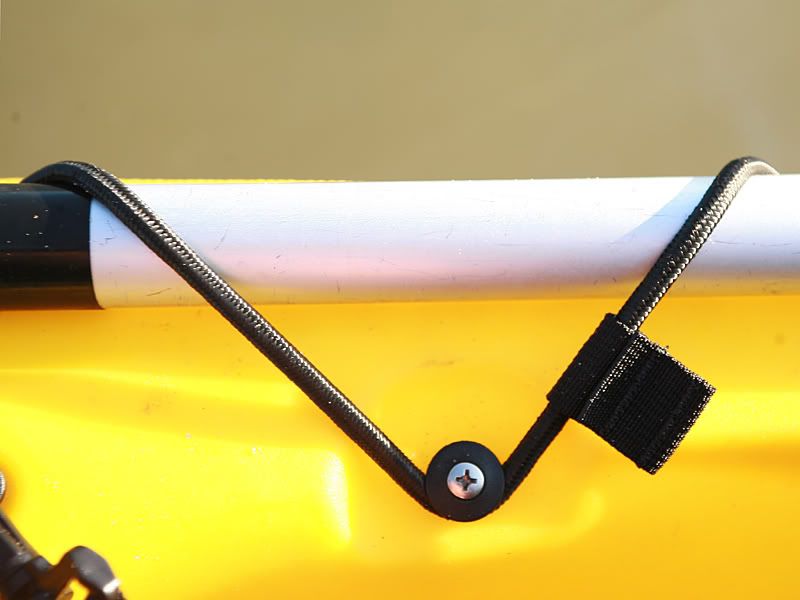
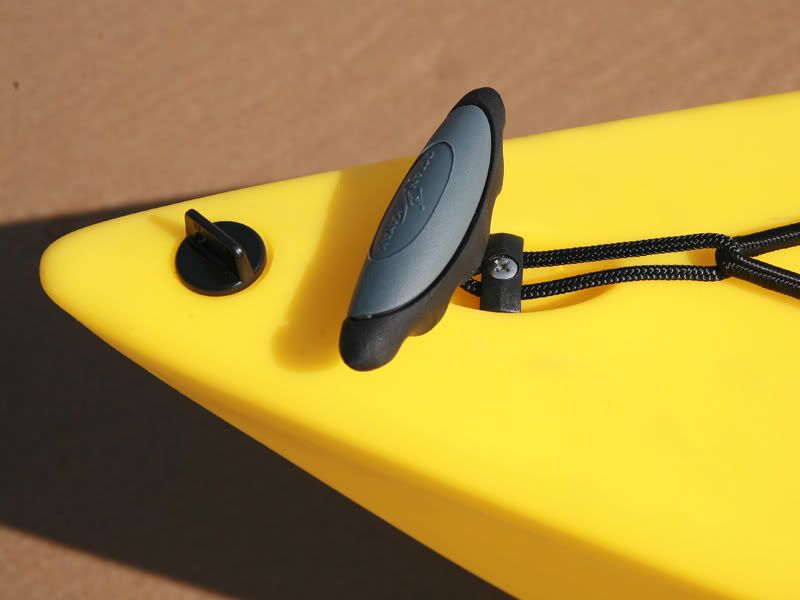
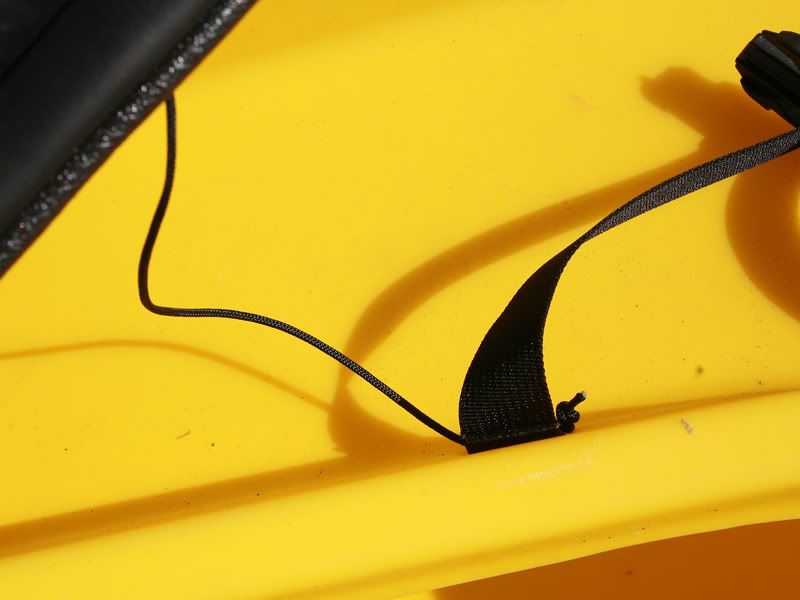
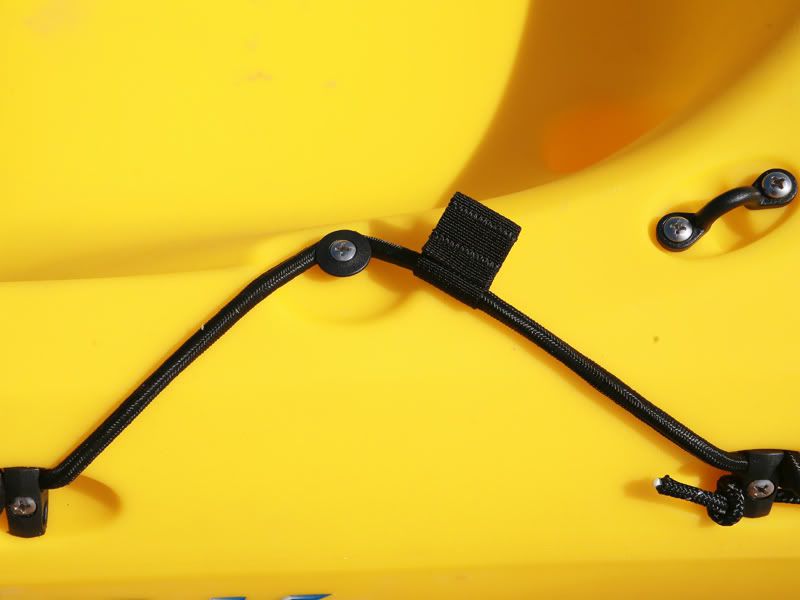
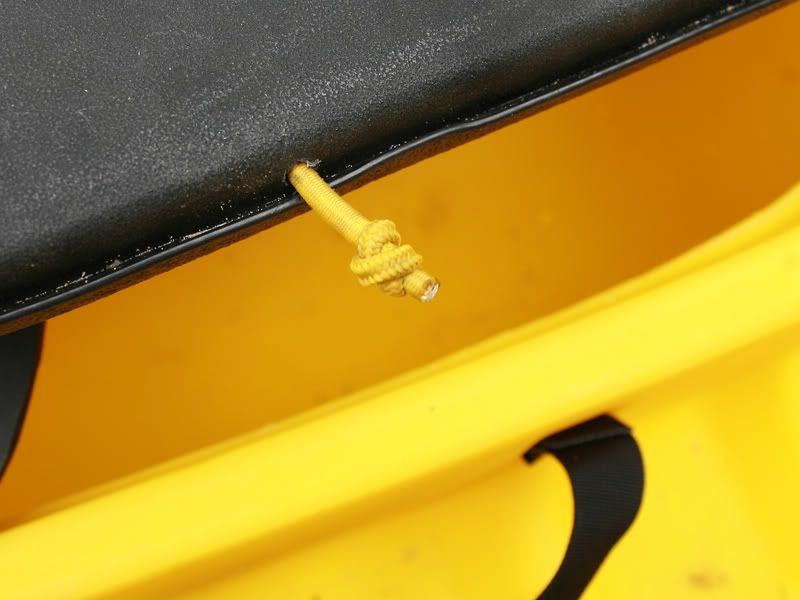
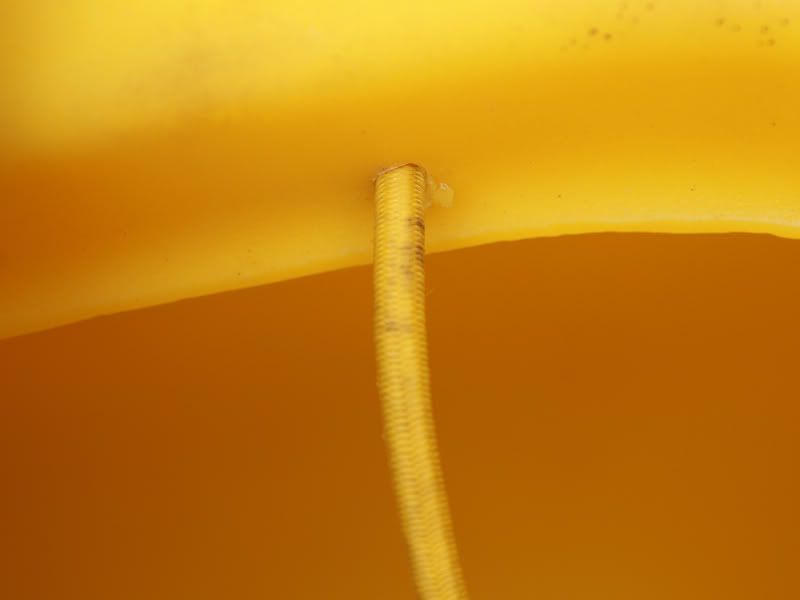
Once on the C-Tug and tightened up I took hold of the rear toggle handle and began to haul it down to the beach. Again, the extra weight was clearly noticeable but at no time did it become a struggle. Here I took heed of the first change in the fixtures. The toggles aren’t attached to their own point as on the 15 but instead go through the two holes and around a shock-cord deckline. This has the effect of pulling tight any slack and thus making the pulling of the kayak more steady and I would imagine it also keeps rattles down. The following photographs show what I mean, but using the forward toggle:
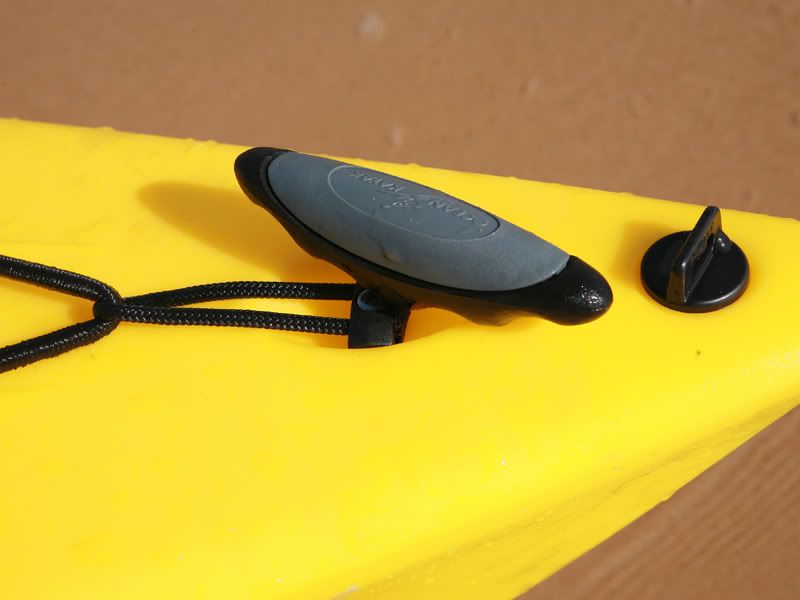
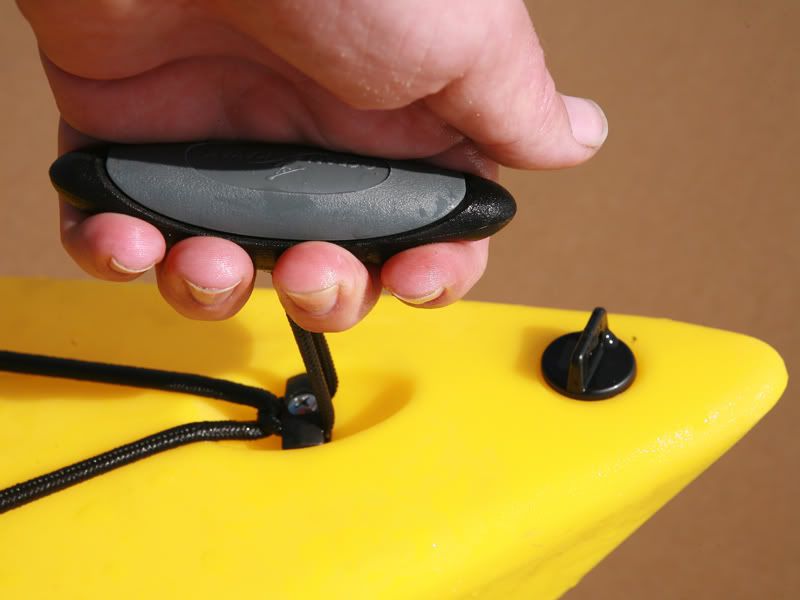
On the way down to the beach I liked that, and found it well thought-out and useful. I changed my mind, however, on the way back when I used the front toggle to pull it home. SO different. Maybe it’s tighter pressure on the shock-cord or something but it was uncomfortable for me. This was compounded by having the drain plug in the way as well and by the time I’d returned home I had changed my tune completely. It was no major job to undo the various fixtures and cords and re-thread them though and I now have the toggles hanging loosely with the bungee pulled tight – and the pressure on the toggle will be the same with or without extra’s placed under the bungees. Incidentally, the drain plug appears to be made from a stronger and more hard-wearing plastic than that on my 15.
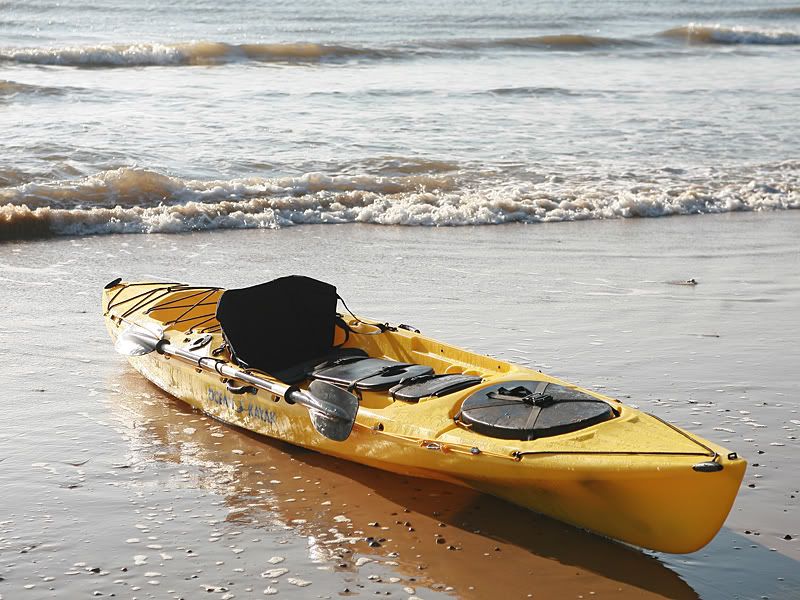
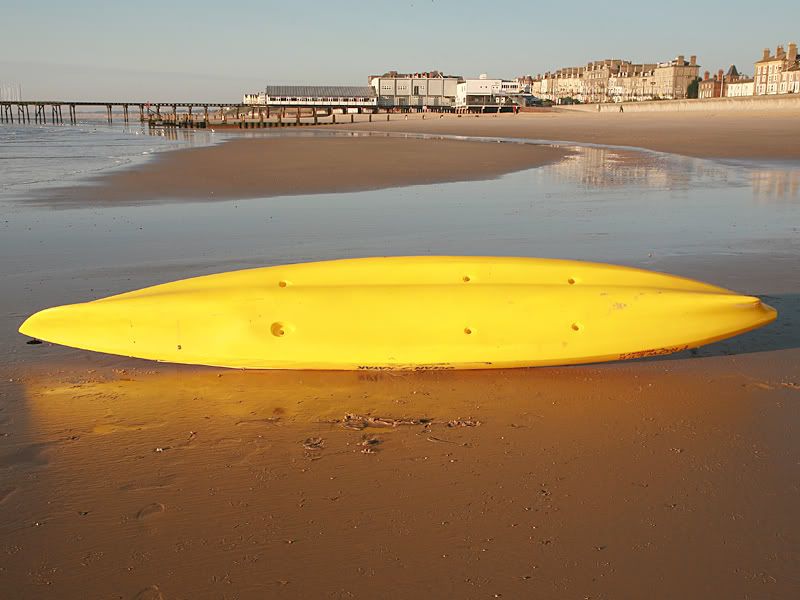
Once at the beach I unloaded and dragged it into position without the trolley. It moves easily enough on wet sand. I then took the following general shots of the whole boat:
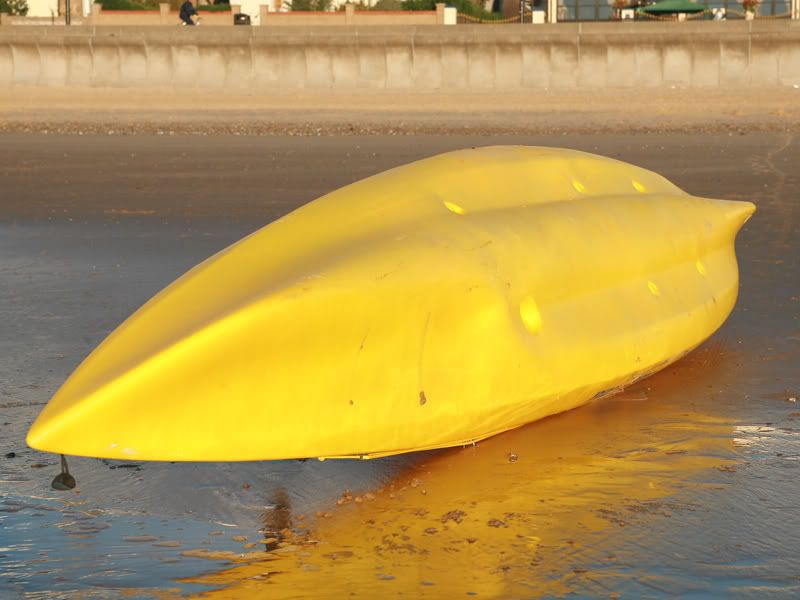
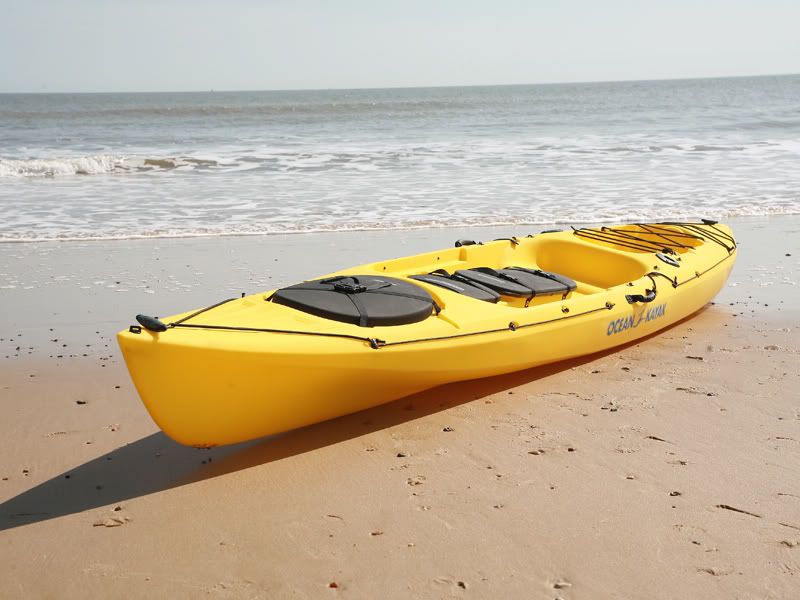
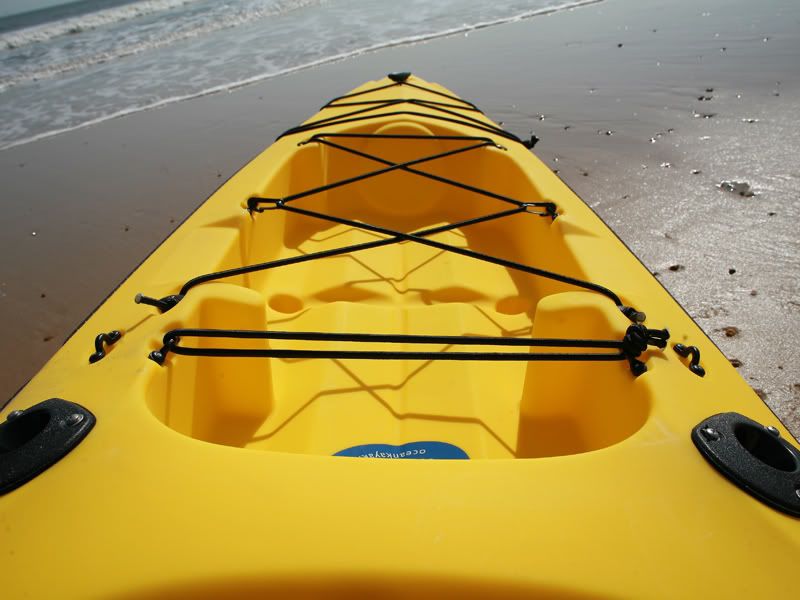
Front quarter, showing the bow:
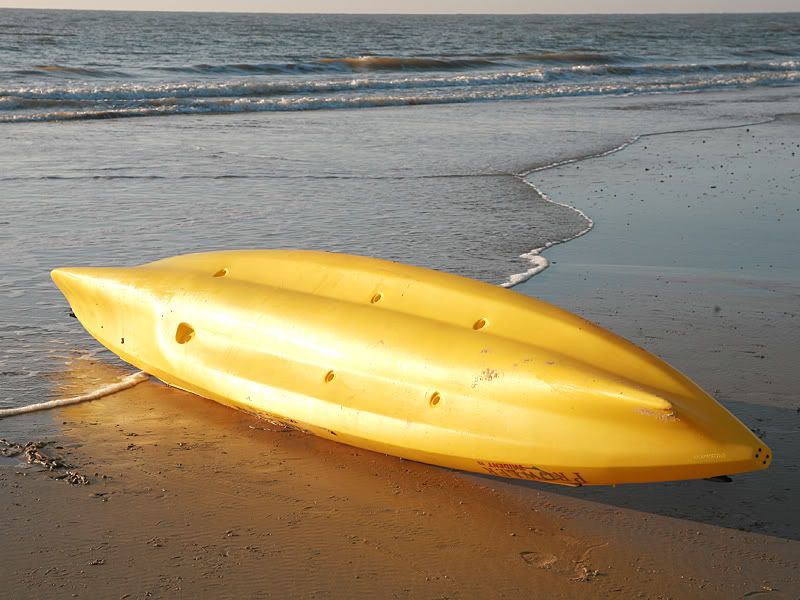
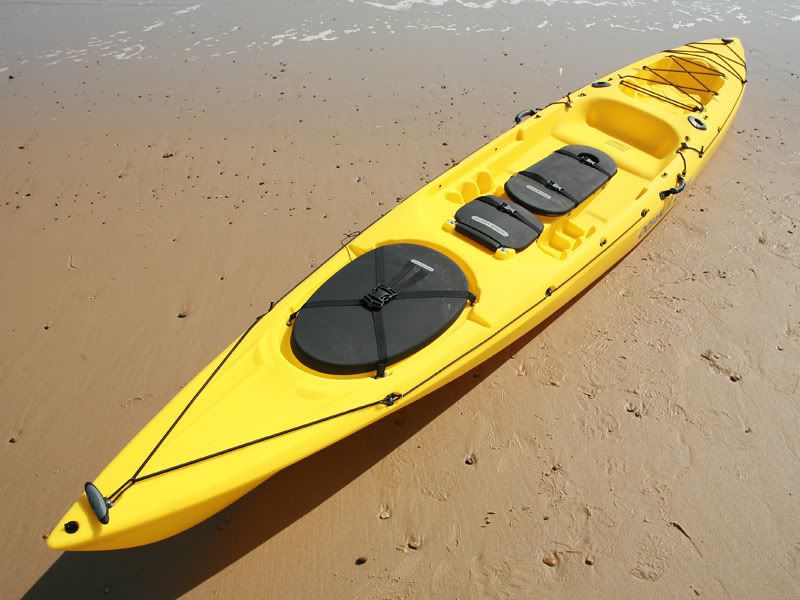
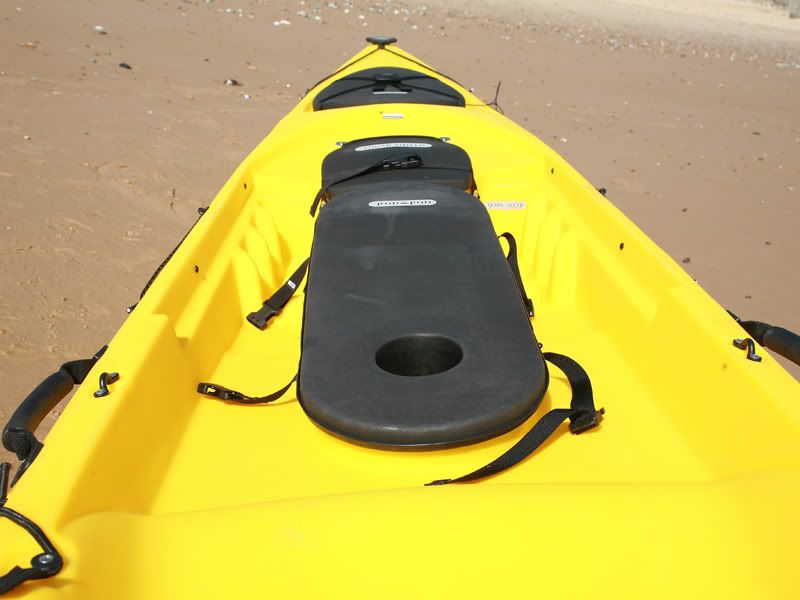
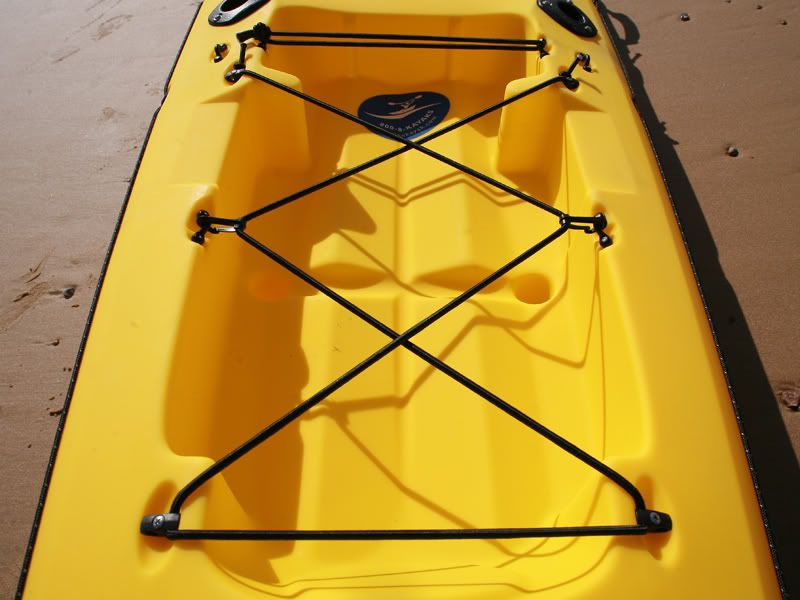
A higher angle to better show the general layout of hatches, tankwell and seat area:
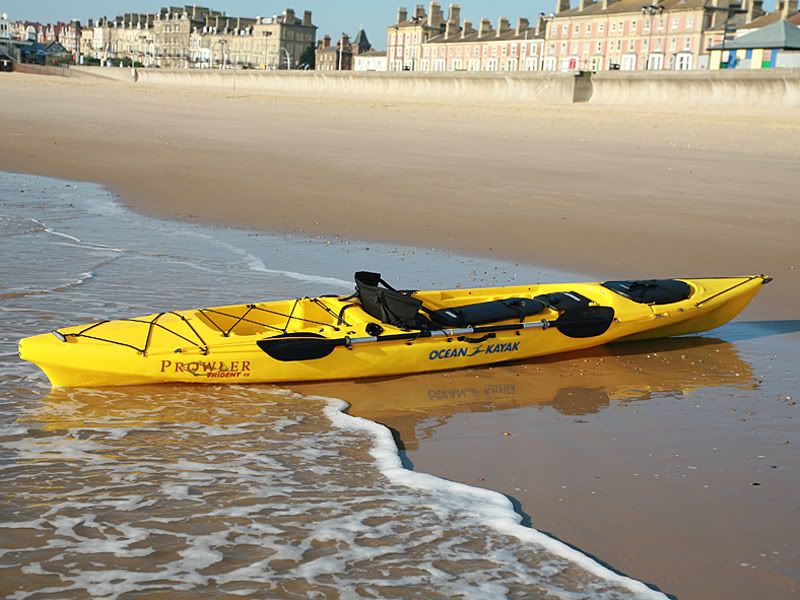
The rear quarter and a view of the rudder fixings and rear bungee area
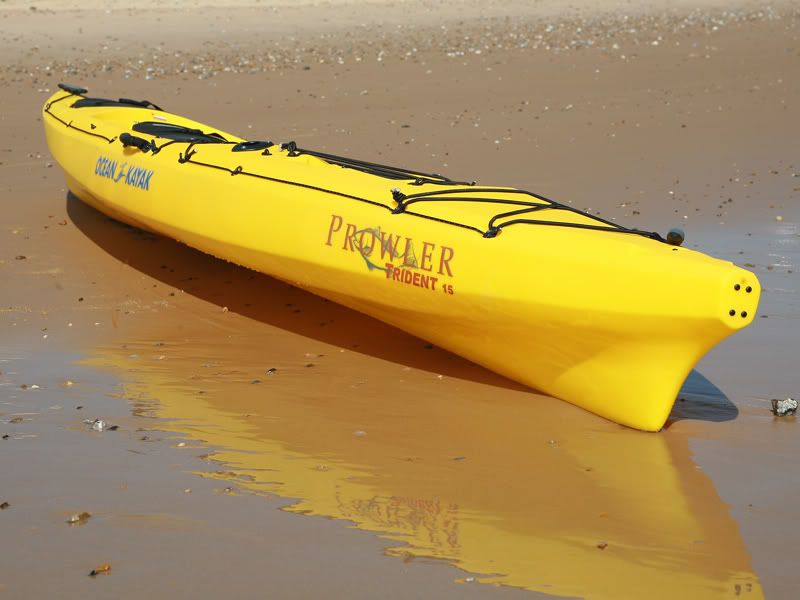
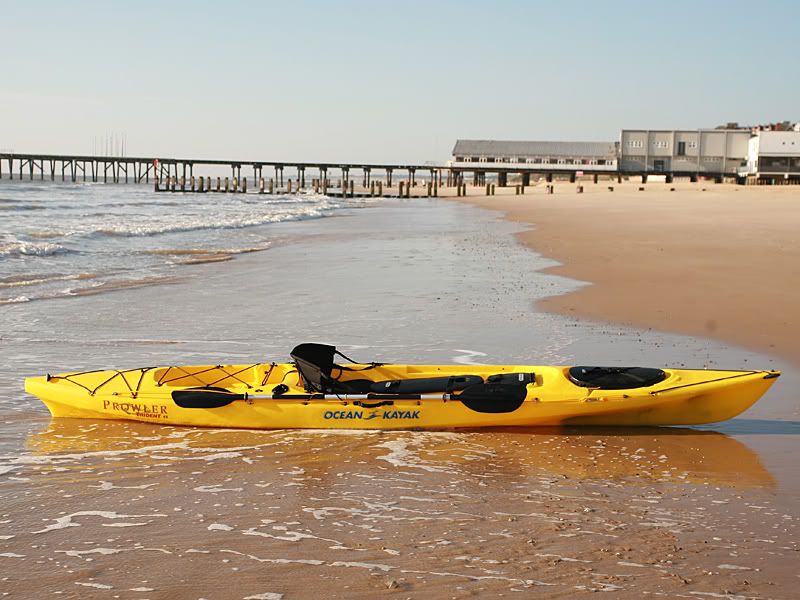
A side view which draws attention to the more angular look of the moulding than on the Prowler 15:

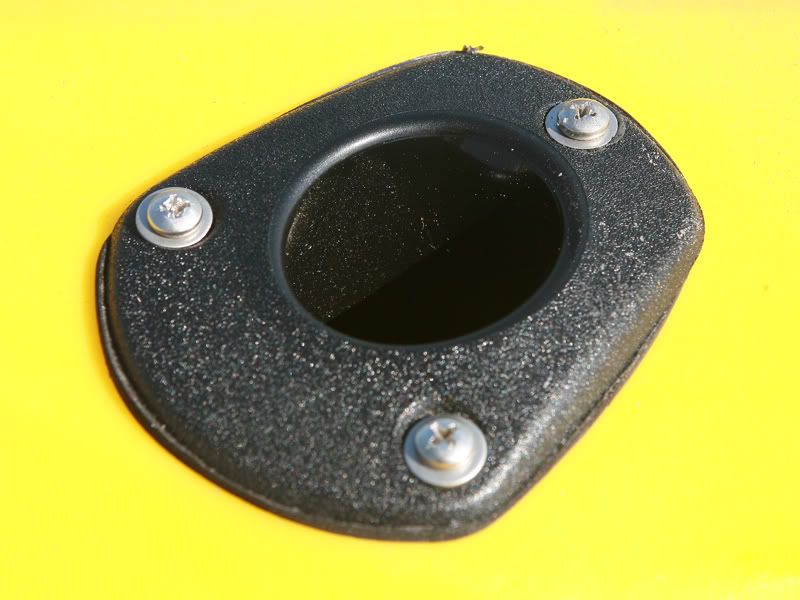
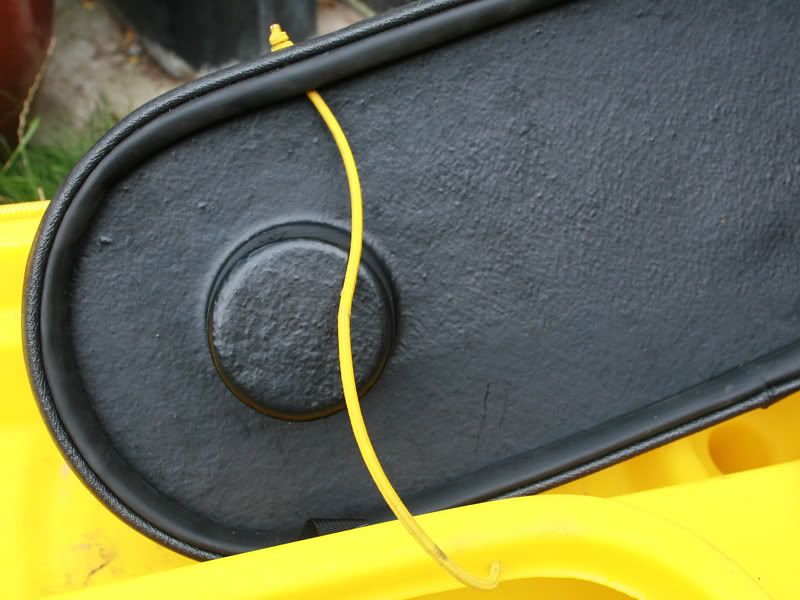
Starting from the front you have the drain plug and toggle handle, both already mentioned:
Next comes the forward hatch which is of a less flexible and more sturdy feel than that on the 15 and which feels a lot more secure ‘in-place’, giving an impression of water-tightness. It felt snug and secure.
(Photograph to follow)
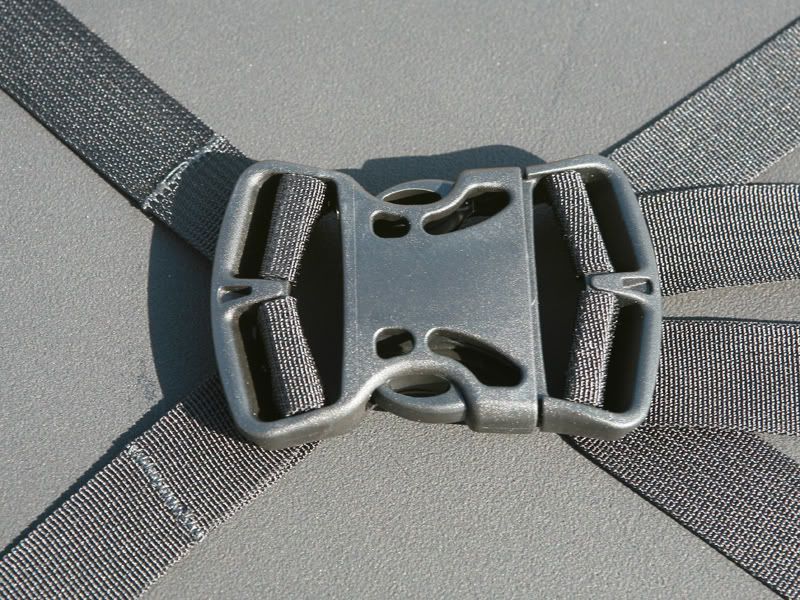
The hatch is then secured by the crosslock buckle which is again very secure and inspires confidence. It also appeals visually and ergonomically – and doesn’t need two handed operation or 4 straps to be put into place.
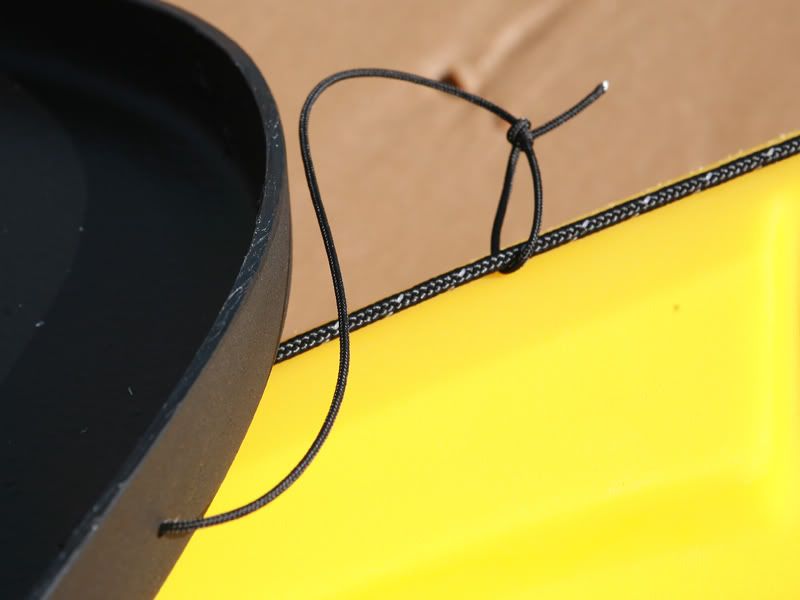
Now, on the 15 there is an extra strap on the front of the hatch which secures it so it can’t fall off. OK have opted instead to put a thin cord through a small hole in the side of the hatch and tie this off to a bowline. Effective and lightweight for sure and a minor detail but it doesn’t quite match the quality of the rest of the design – it looks like an afterthought, but does the job.
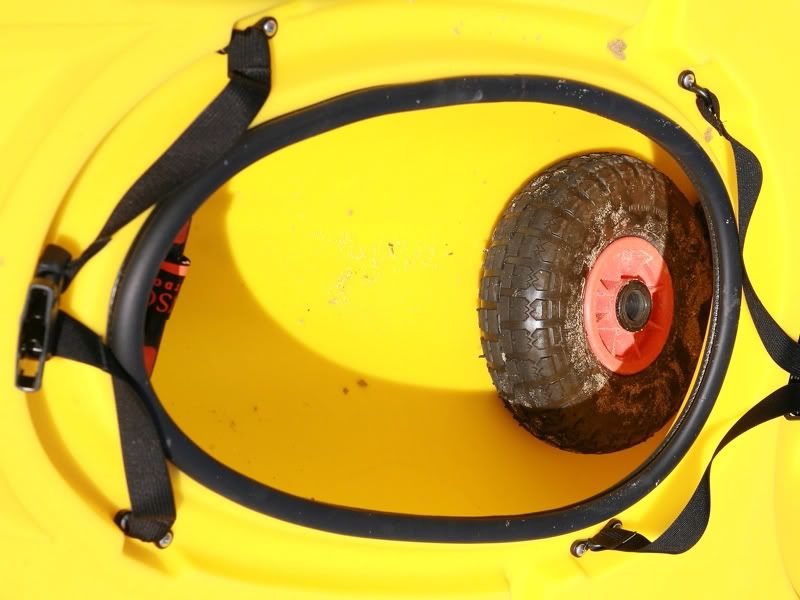
But what a hatch! It’s HUGE! Until you try to put stuff in you don’t appreciate quite how different it is. I usually have to put my C-Tug in methodically to get everything to fit and balance out after stripping it down into 5 parts. The Trident will take it in 3, the two wheels went to the rear and the crossmembers and supports stayed in one piece and pushed up to the bow. This had two immediately obvious advantages over the 15. Firstly, the balance would be better as the forward pieces remained upright and wouldn’t move about loosely. Secondly, by shifting the wheels backwards the nose would be lighter and thus more buoyant. Furthermore, I still had loads of room and could easily add a buoyancy bag or dry bag full of clothes. Perhaps even both.
From inside, looking backwards:
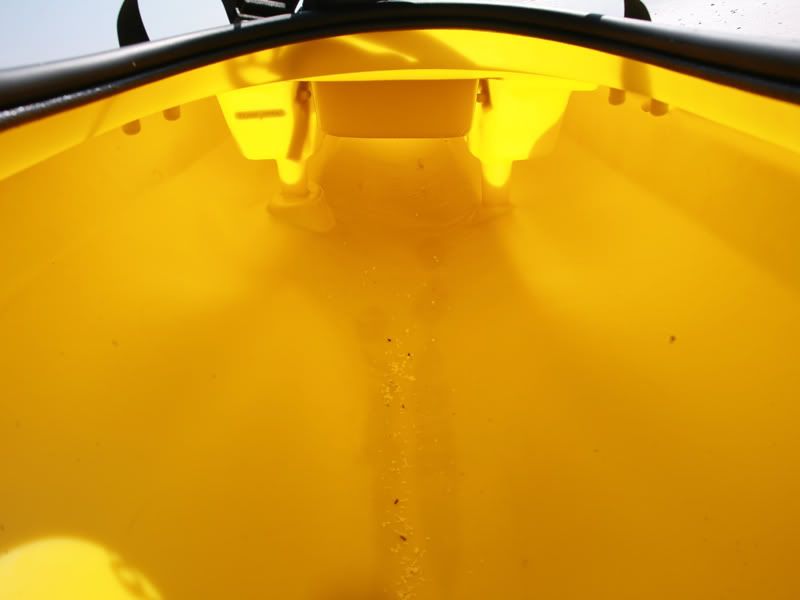
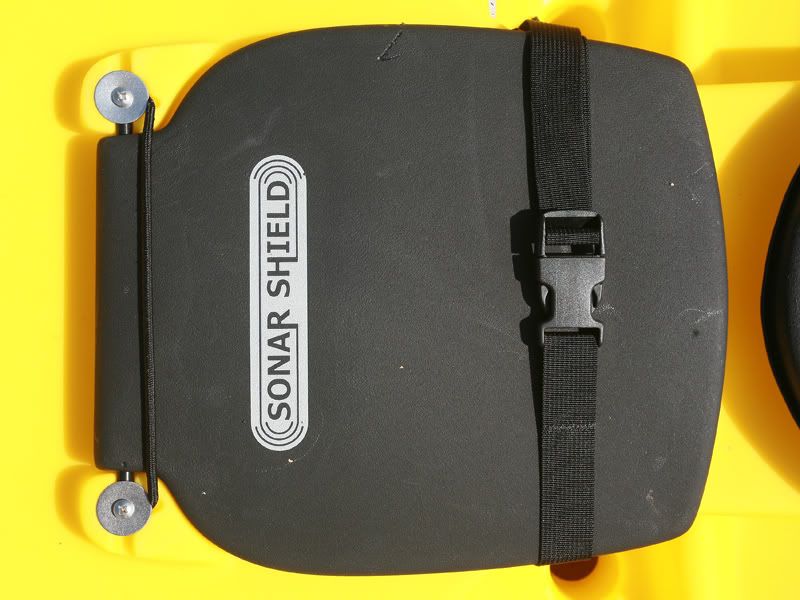
Next up was the sonar shield and fishfinder well. To me this is a very welcome addition – whenever I launch a wave goes over the bow and hits the back of the finder. The pressure of this is greater than that which the waterproofing is generally rated for and thus condensation becomes an issue on the screen in short order. I don’t see a problem now – the finder itself can be folded flat with the shield over the top and clipped down, streamlining everything and keeping the rear dry (ish) and away from excess pressure. The shield then flips up for actual use and still shields the back of the unit as well as reducing flare. Shock cord acts as a spring to keep it pushed down onto the finder itself too, in position and not flapping about in the wind.
More thought has been put into this too. Drainage slots are a featured part of the well and these also allow the transducer cable to run down to the transducer scupper making the addition of a hole for running the transducer inside the hull unnecessary. This is one less area for a leak and also means the transducer will give more accurate information on water temperature and optimum performance as a finder.
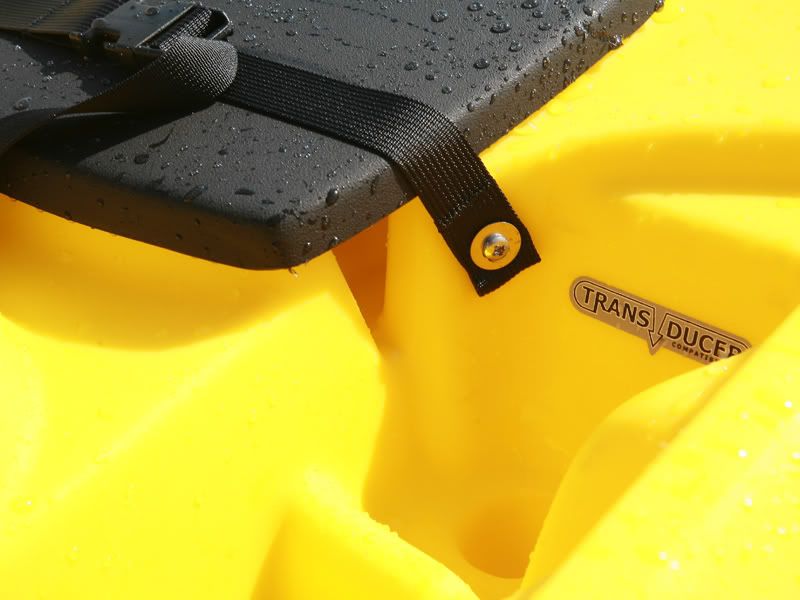
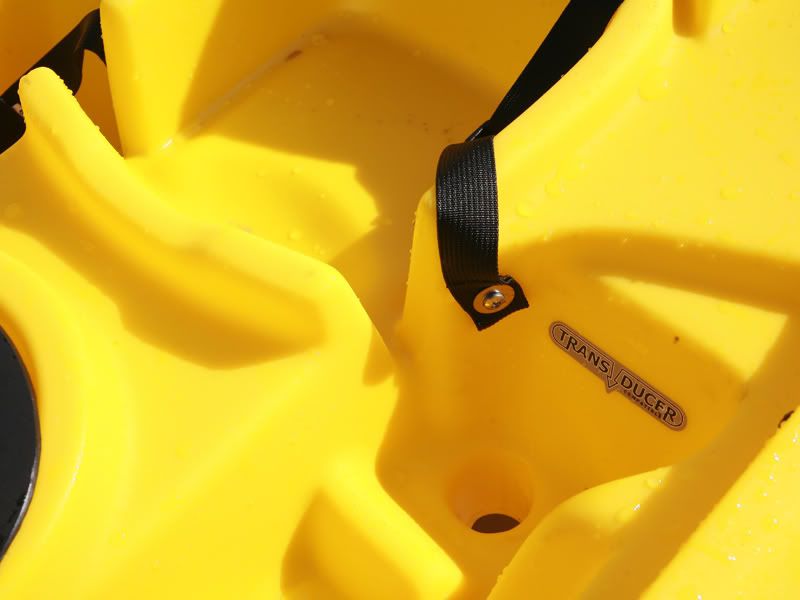
The transducer scupper hole, from underneath, is obvious in that it is far larger than the normal ones. It’s actually quite deep and formed in a teardrop shape which I presume to be for enhanced aerodynamic flow of water as the standard scupper holes also have a teardrop-shaped surround. (Please note that the photographs of the scuppers are not at the same magnification and are thus not in scale with each other).
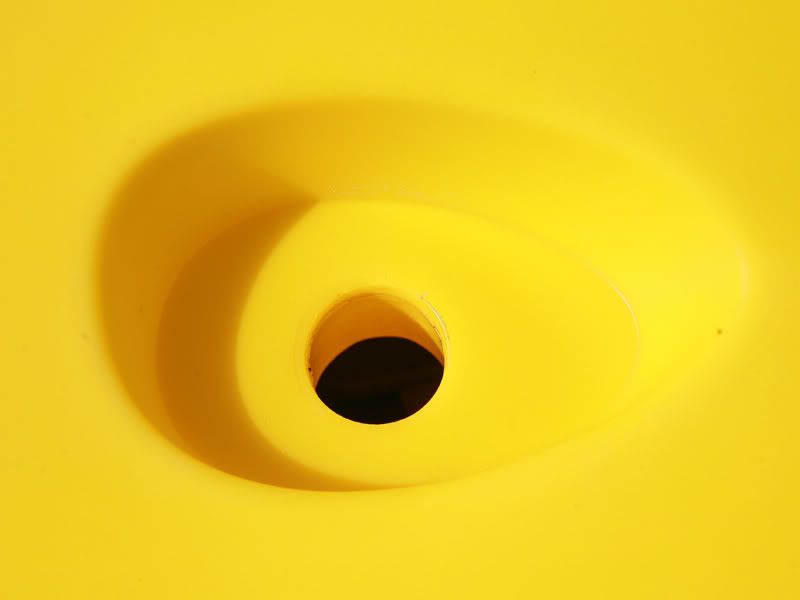
These scupper holes are in the footwells. These have been redesigned and are self-draining. In the Prowler 15 I would always have water retained between the ridges but the Trident has gaps for this to flow through and down where it does drain away very efficiently. I know they work because although I still got a lap full of water going out through surf but it all disappeared. A great improvement and one which wuill be of added benefit when fishing in the winter.
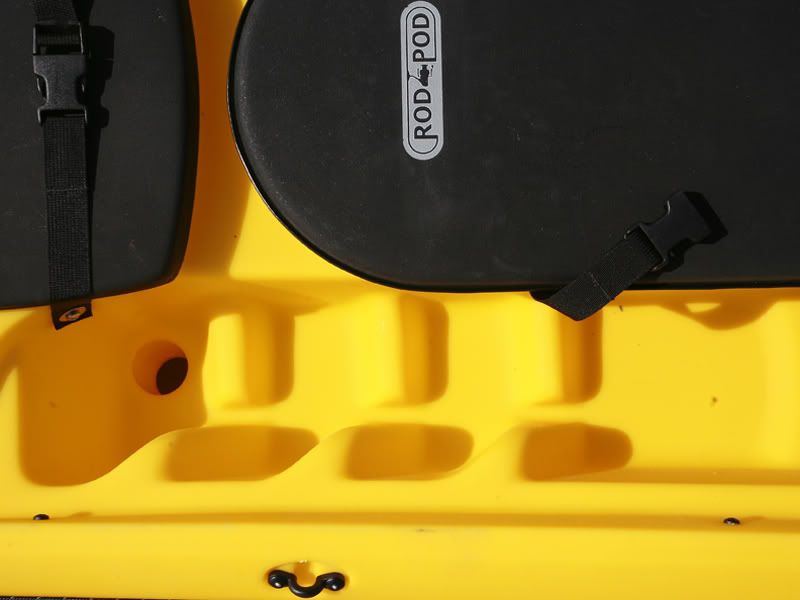
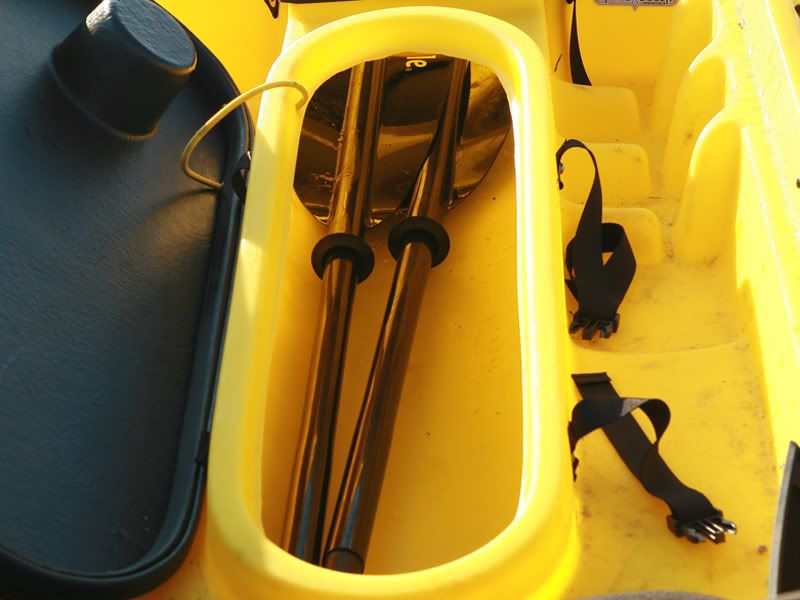
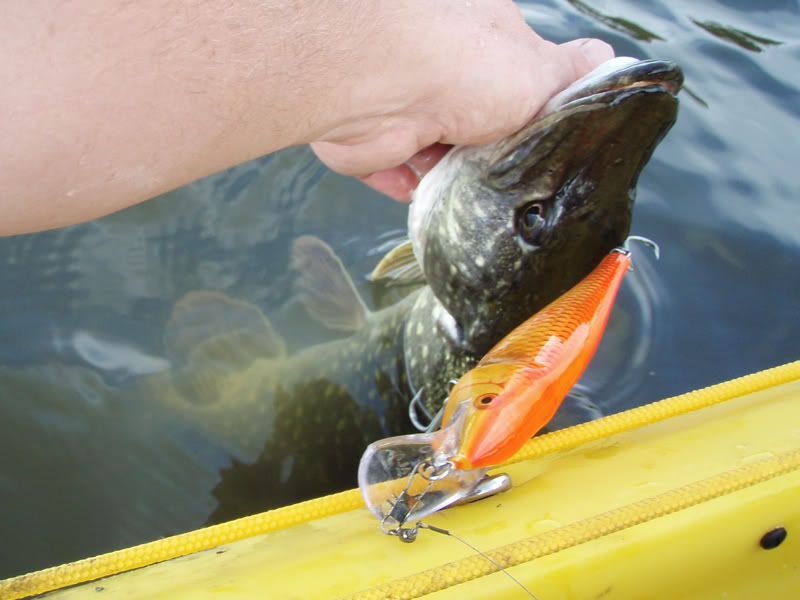
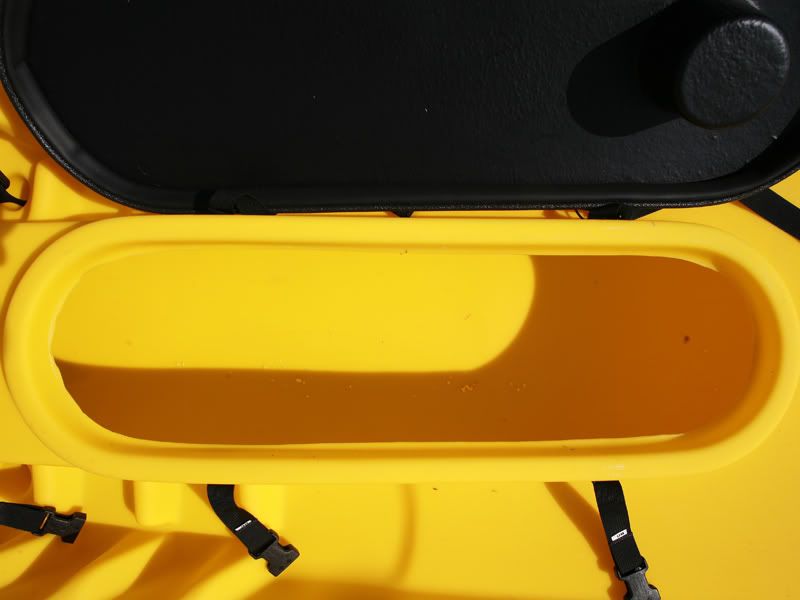
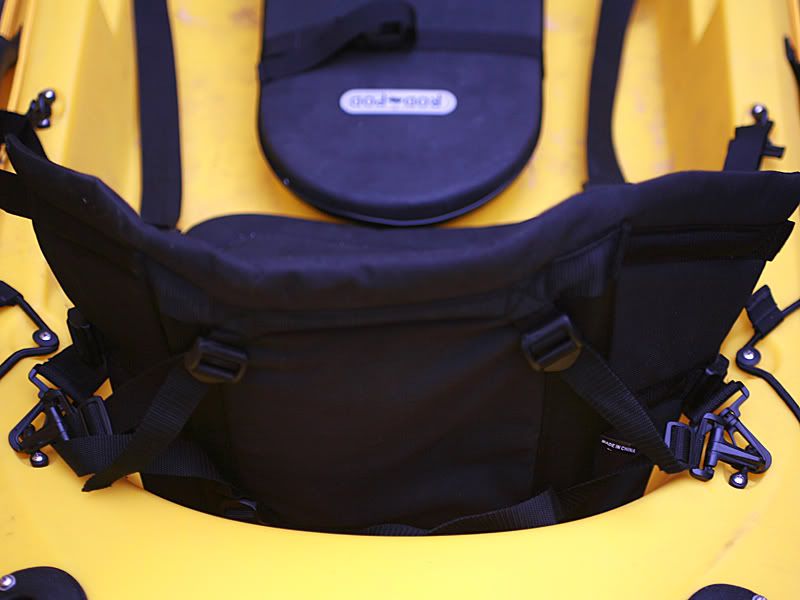
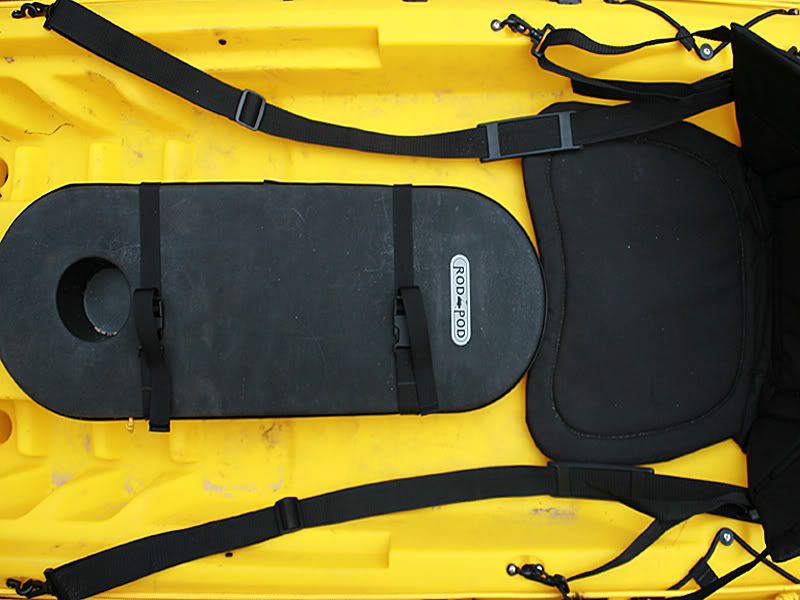
Next comes the Rod Pod (or Cod Pod with a bit of luck!). This is the feature that first impressed me when the Trident was announced, and which I had admired on the Kaskazi Dorado. On the 15 I had always wondered what I would do with a decent haul of fish that I wanted to keep - chance would be a fine thing – but now this is no longer an issue. I can now treat fish like beer and send them straight down the hatch! Again, the cover is solid and not too flexible and fits snugly. It is also held down by a couple of straps (though not a Crosslock this time, which would be useful for opening one-handed but not so secure in the event of a capsize).
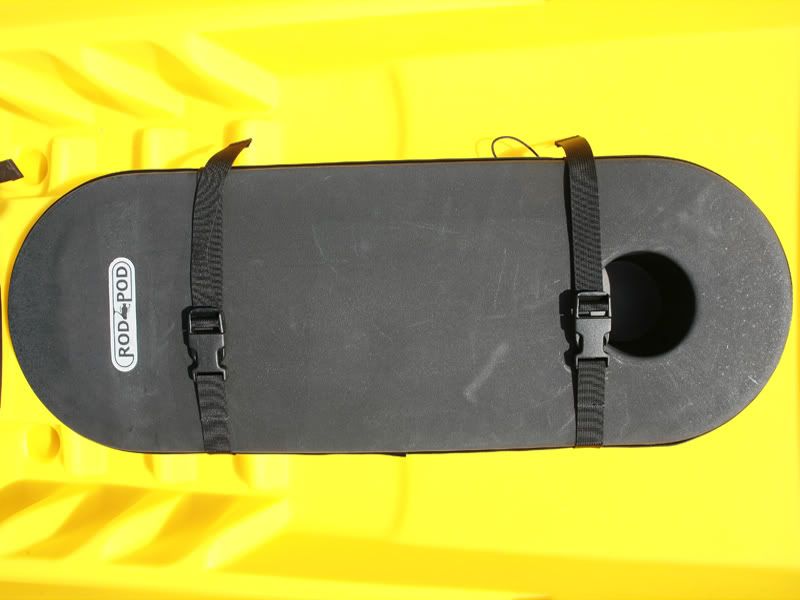
Opening up there is a tray covering half the length. This can be moved around and will prove to be ideal for my use by holding bait where it can be kept dry and secure (ie ragworm/lugworm wrapped in newspaper). Other small items could be stowed here too, or food, and in my opinion it is a useful addition.
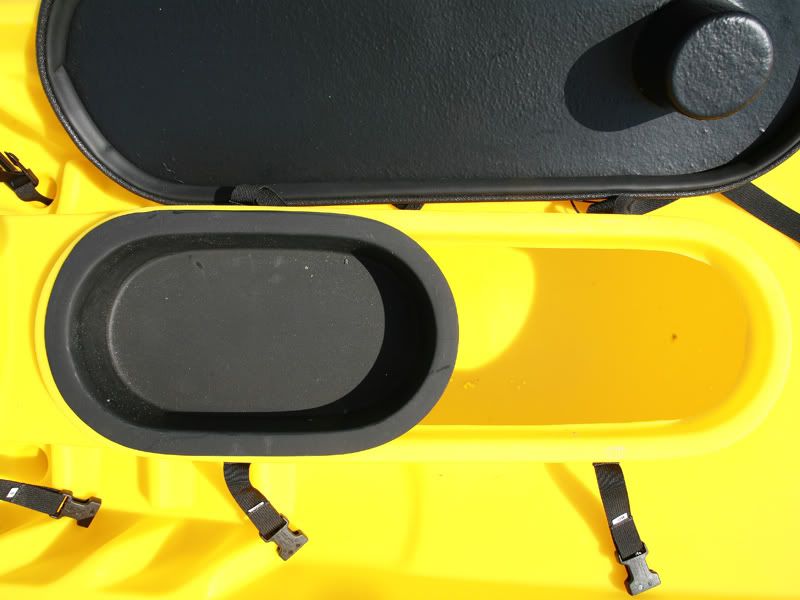
Take the tray out and the entire interior of the hull is accessible. The length and width – not to mention the position - of the hatch itself will make stowage of tackle a piece of cake. No more messing around with rod clips or paddle-keepers or risking flushmounts or turning rod holders around and lowering them, no, even rods of a good length should go in with no trouble. Not only that, any heavy stuff put there is close to the centre of the boat and thus won’t affect the ride adversely. As someone who doesn’t use a crate but who wants to be able to stow things away this is ideal. As a photographer as well as an angler I also now have the option of being able to take a decent SLR with me, where I can get to it at will, without the danger of damage instead of just relying on a compact in the PFD. Hell, I could even get my Crown Graphic in there! OK have just designed the first truly photographer friendly yak!
Oh, the hatch cover also has the bit of string attached.
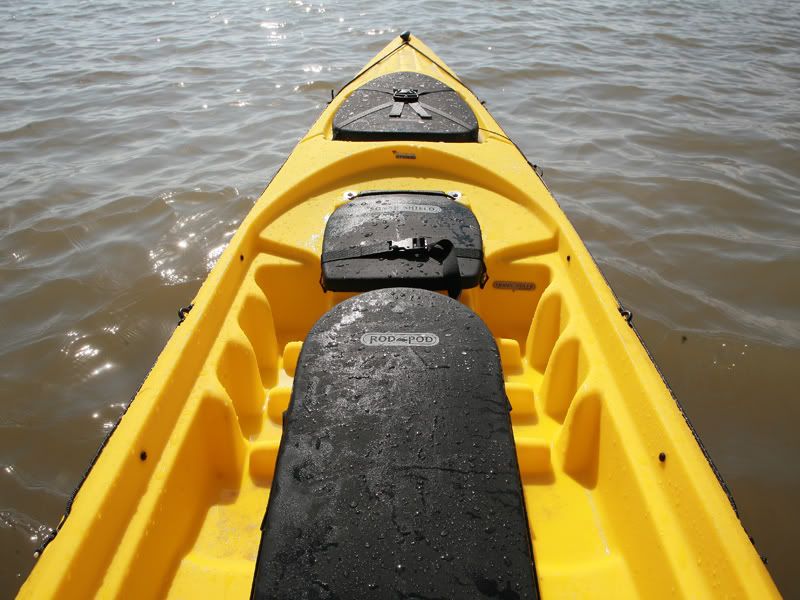
So, from the seat forwards you have the following; hatch, sonar shield, hatch, bowline, toggle, carry handles, pad eyes and rudder peg fitment area:
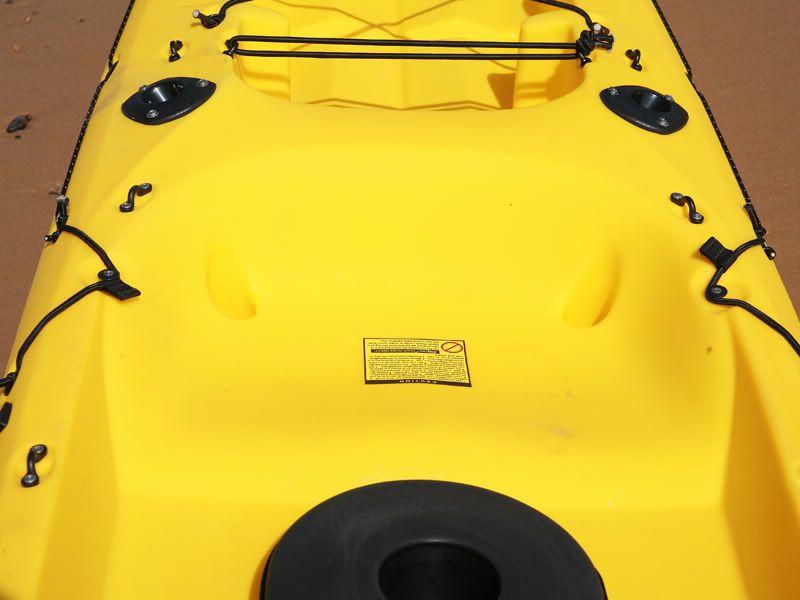
At the bottom of the photograph above you will see a ‘contour’. This is the front of the seating area. Looking the other way you can see the overall shape, with a build up at the front and a slope to the rear (and scupper holes). Thus much of the shaping for a good seating posture is already built in.
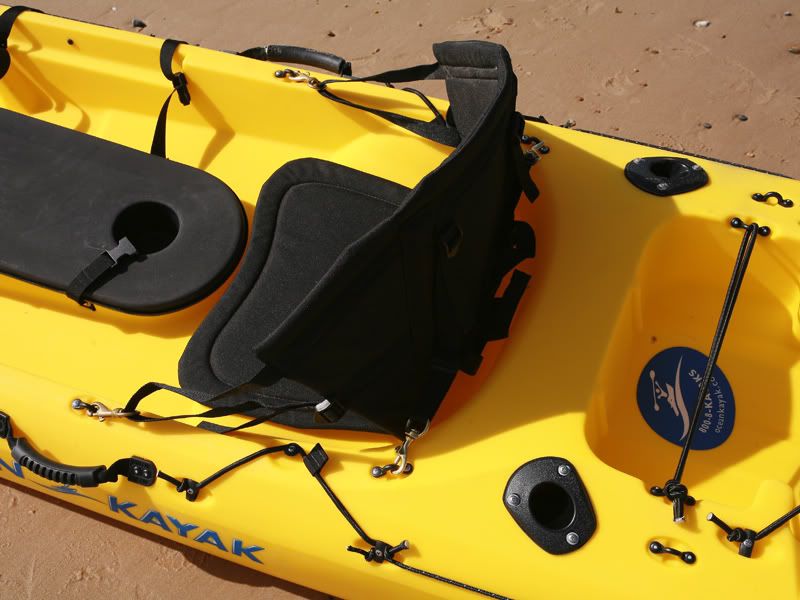
Add the new high-backed Comfort Plus Seat Back and you’re away. Now, there are many options for seats and supports in the OK range and while I found this to be comfortable and with good support in the short time I was afloat today I also found the Basic Seat Back fine for half-day paddles in the Prowler 15. This came a lot higher up though and should make heavy paddling easier.
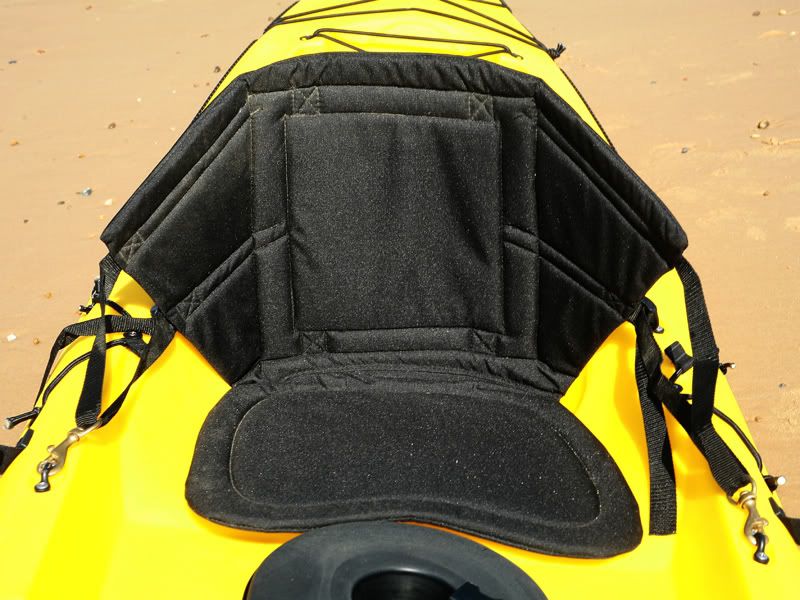
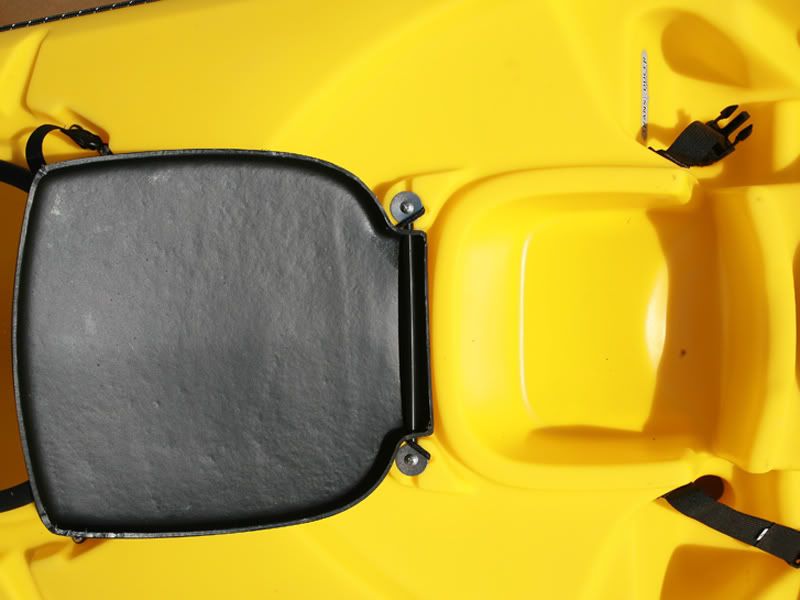
The seating area:
The paddle keepers are almost the same as those on previous kayaks but have the addition of tabs that make it a bit easier to grab hold of them, especially with gloves. Nice attention to detail that.
Behind the seat are, of course, the flushmounts. These are unchanged and useful for both rod storage on the water and trolling lures from as well as fishing from if sitting side-saddle.
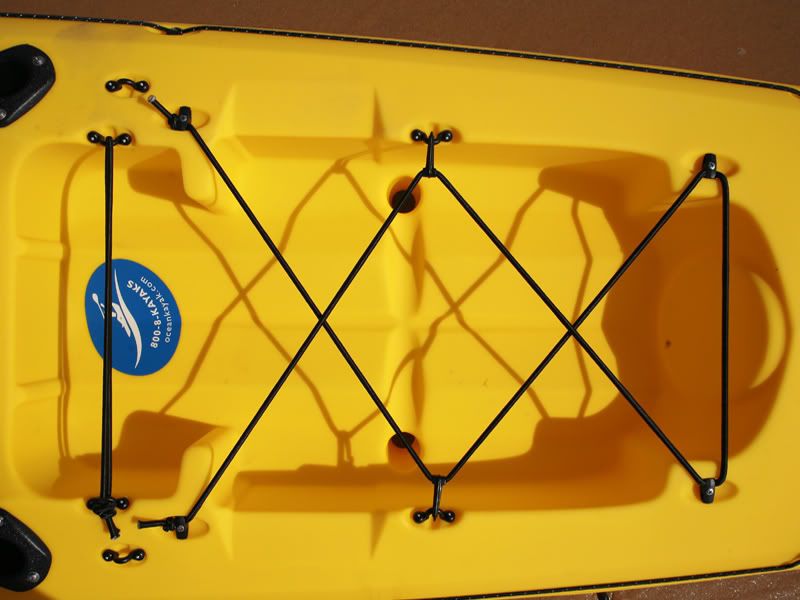
The rear tankwell is next. Proportionally this appears to take up less area than that of the 15, having thicker sidewalls, but does in fact appear to be larger. However, it has been extensively redesigned and a lot of thought has been put into it. No longer is there a flat tray with 2 scupper holes – this is shaped and channelled and the scupper holes are actually lower than the main body and thus get drained into. This may not seem that big a deal but I for one will find it a bonus.
Something that I also liked was the central ‘dog clip’ attachments on the shock cord. Bungees can go everywhere when unhooked from buttons but this will all stay in position and the clips can no doubt be attached to crates by those who use them. There is also some bungee cord across the narrow piece of the tankwell just behind the cockpit. I can’t work out it’s purpose (nor, actually, the narrower section as it happens) but if it does get in the way it is easily removable. The pad eyes are sure to come in useful anyway.
From the other end:
Right on the stern there is more shockcord formed into a small cargo web. Handy to have but most likely not something that will be used much.
That’s the end of part one, what it looks like and how it’s laid out. My personal opinion is that it’s very well designed throughout with only the odd minor niggle as already pointed out. It looks the business and appears to be a capable kayak.
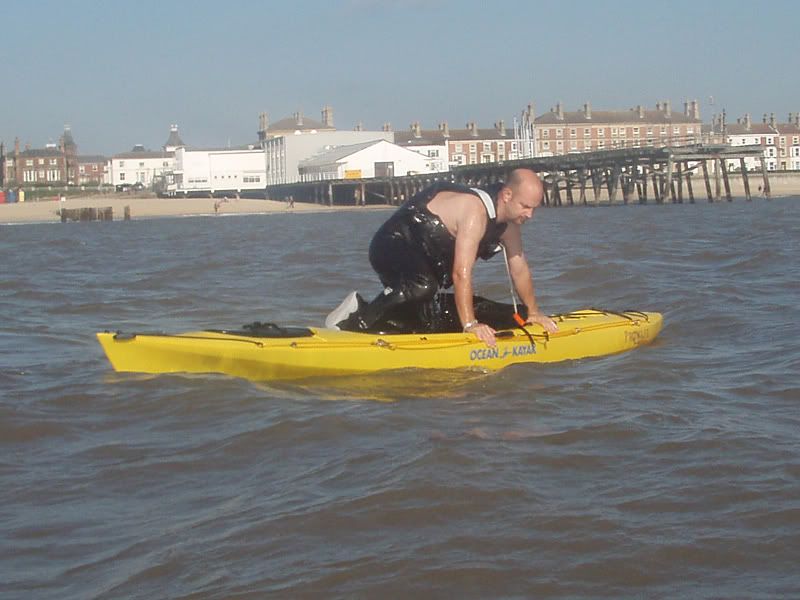
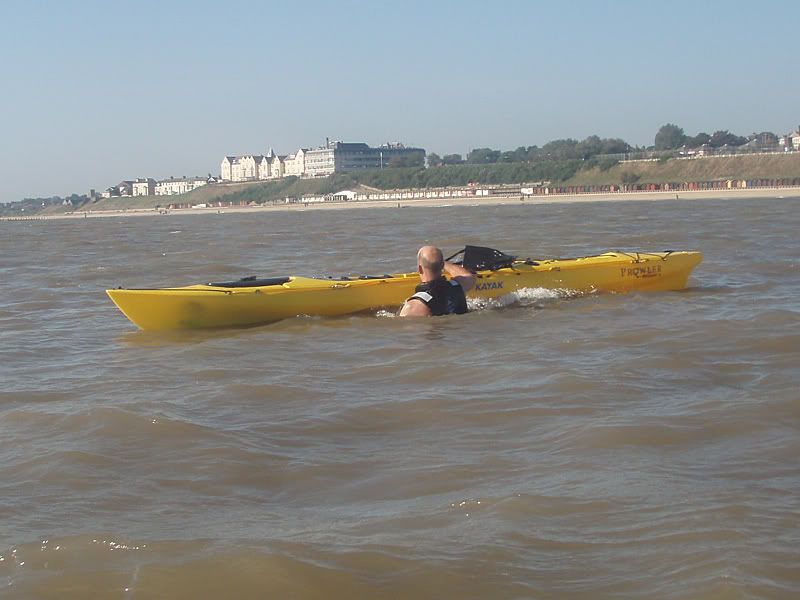
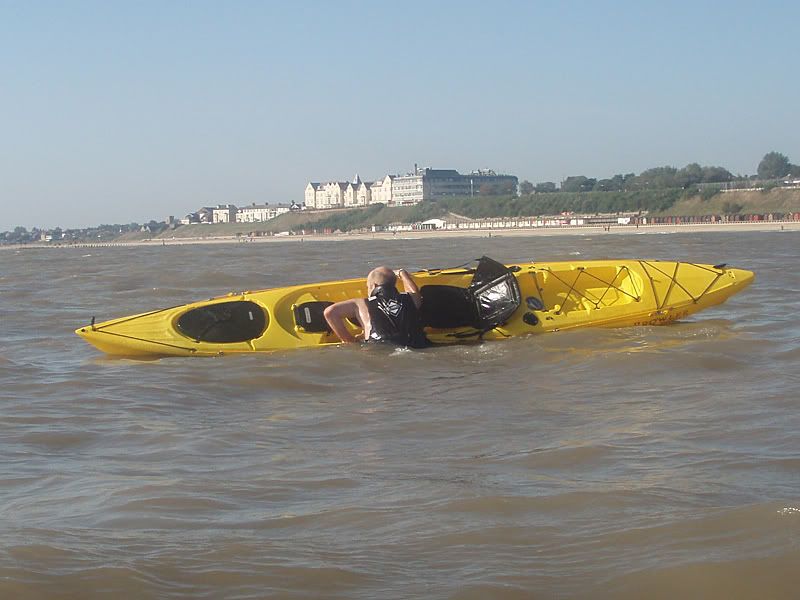
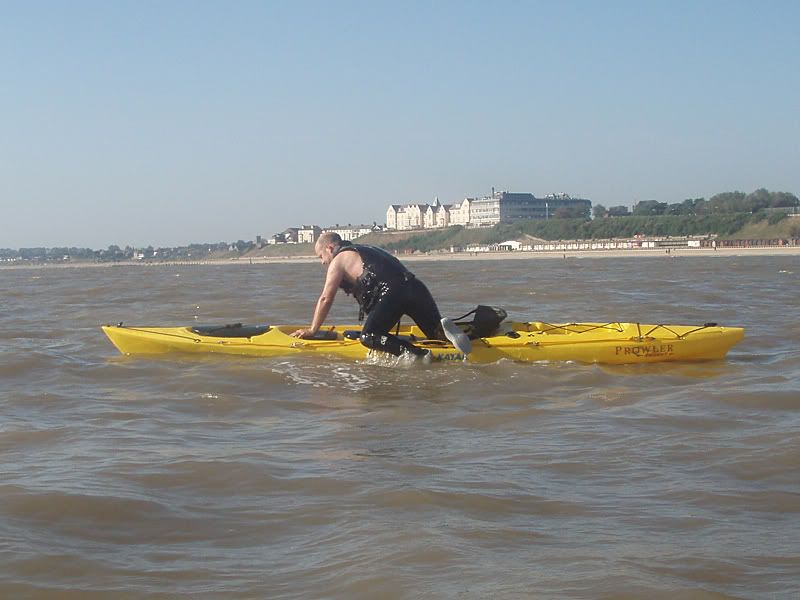
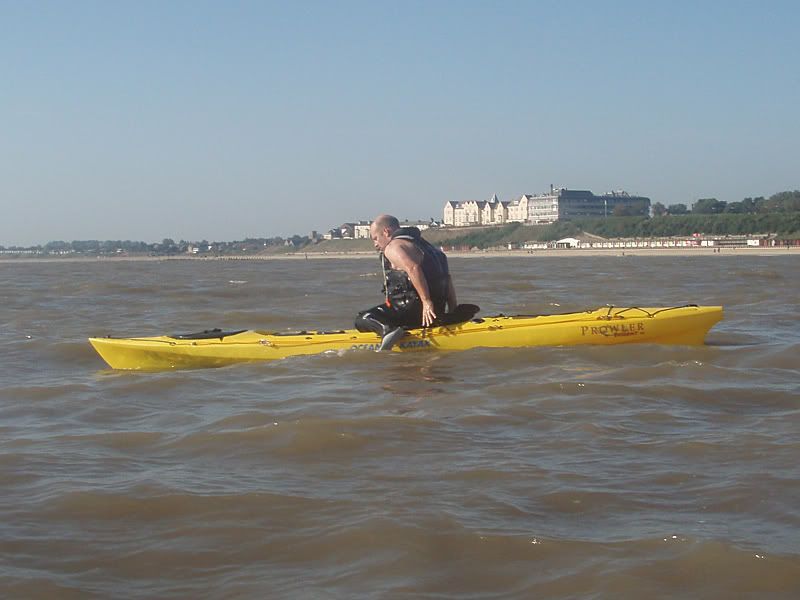
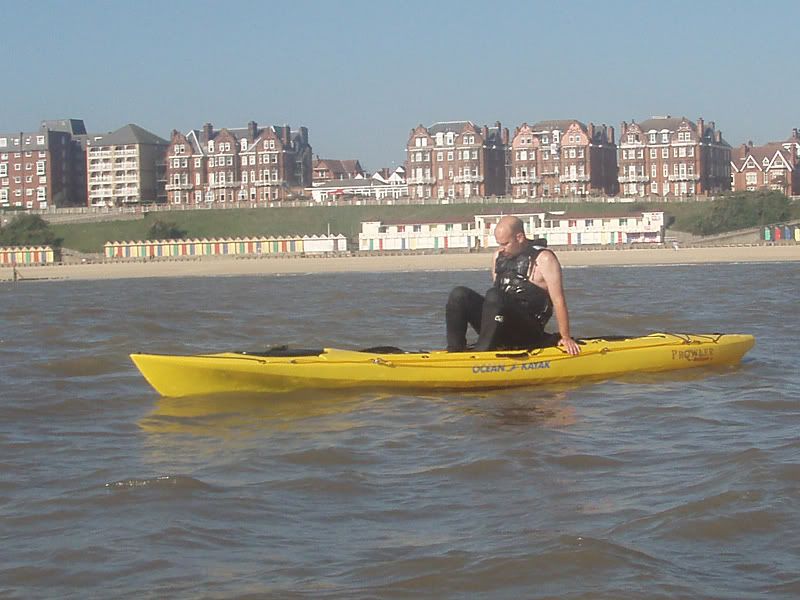
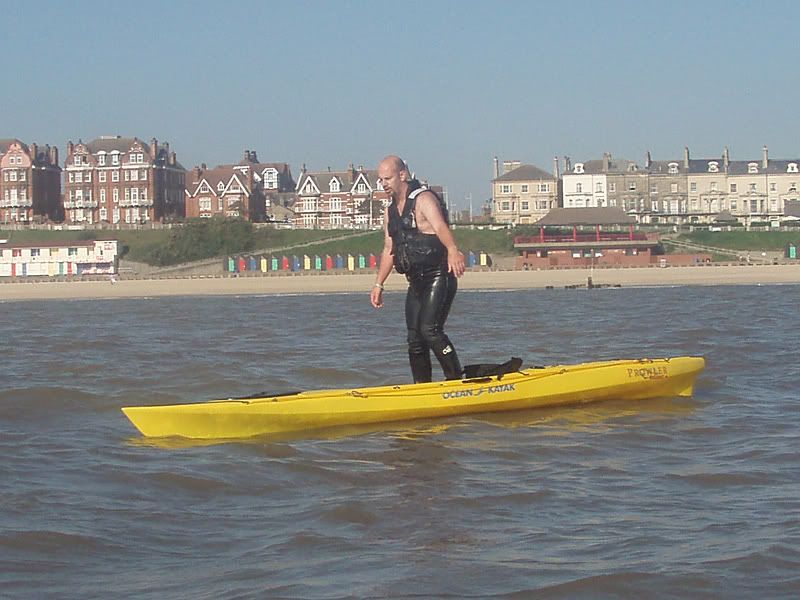
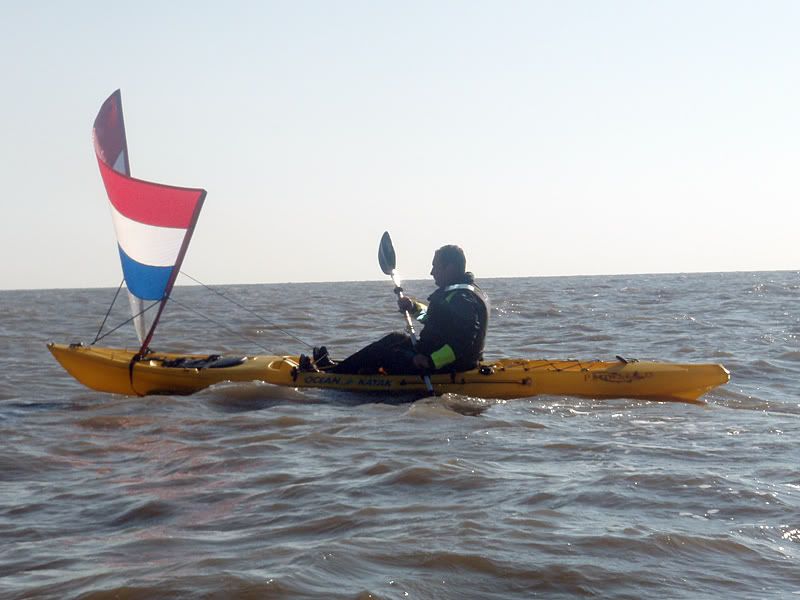
But don’t just take my word for it:

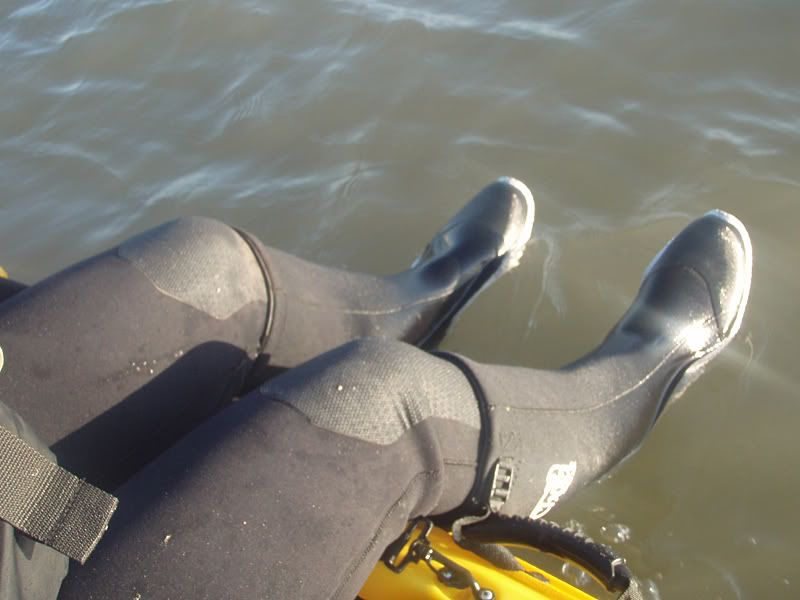
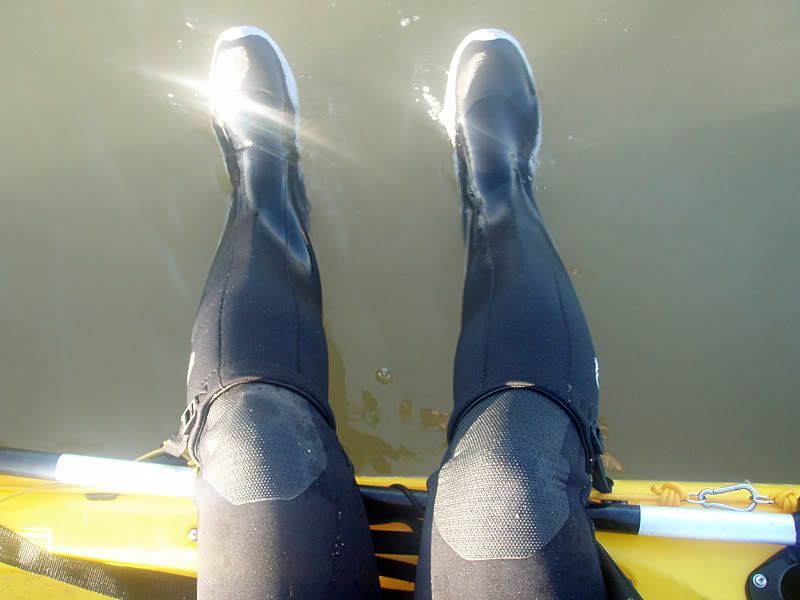
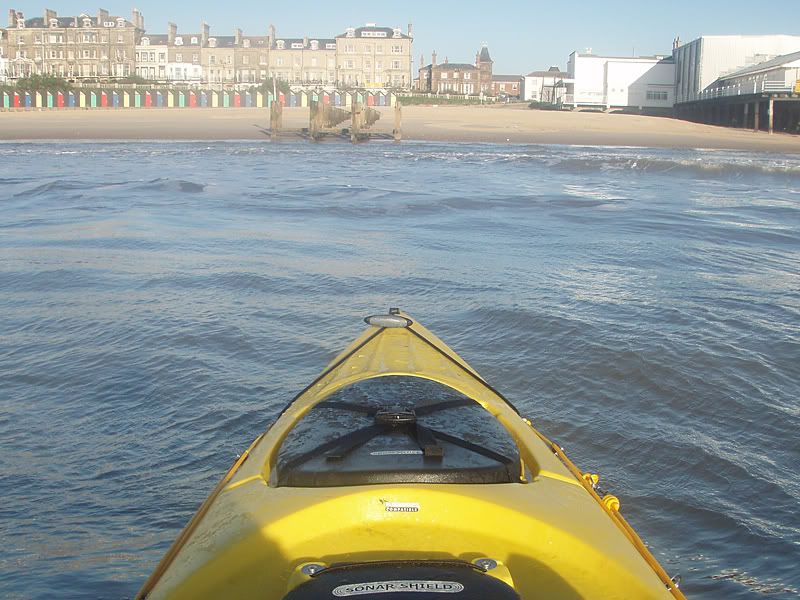
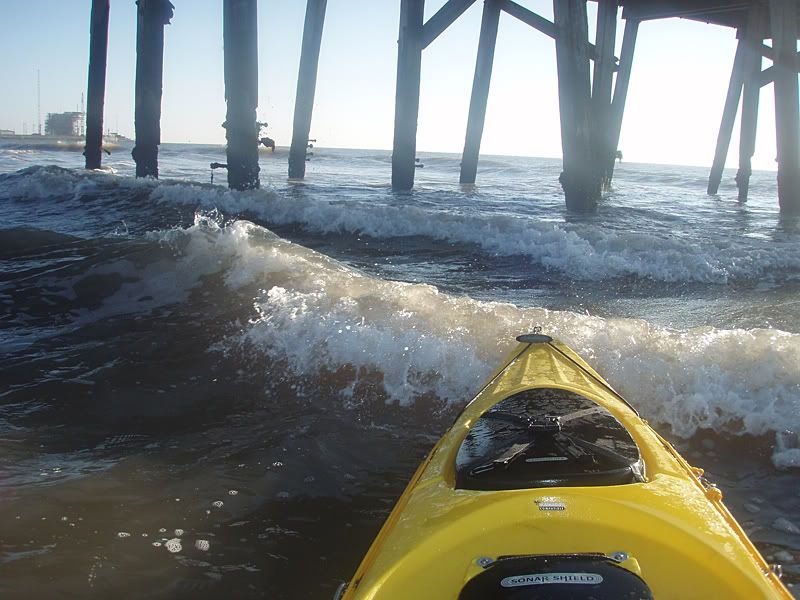
Part two will deal with my initial experiences on the water as I took it for a short test drive.
Rigging the Trident Part One.
This is the first part of the rigging of my Trident ready for when it gets out on the water for a fishing trip.
First job was to fit anchor trolley systems, on both sides to give me the choice when at sea. A visit to the local chandlers saw me sourcing what I needed and the photograph below shows the components for ONE trolley, everything being doubled and mirrored on the opposite side and I will write this from the point of view of a single trolley from herein to avoid confusion. Prices in Sterling, totalled for full quantity of each item.
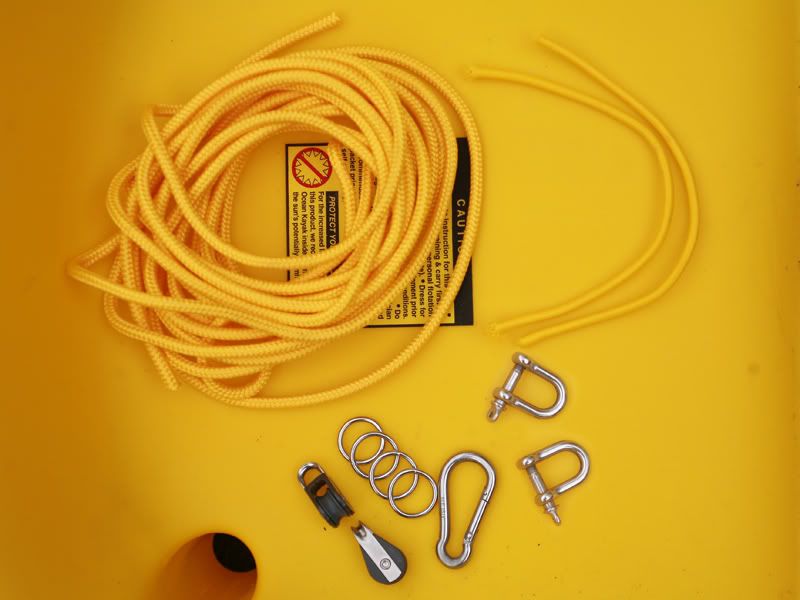
The components are as follows:
7m of 7mm Yellow nylon cord - £4.90
1m of 4mm Yellow shock cord (cut into 4 pieces of 25 cm each) - £0.70
2x Rino Pulley Blocks - £7.00
4x 3x20 Stainless Steel O-Rings - £1.60
2x 5mm Stainless Steel Bow Shackles - £1.40
1x 8mm Stainless Steel Carabiner - £3.00
Total Price (one side) - £18.60.
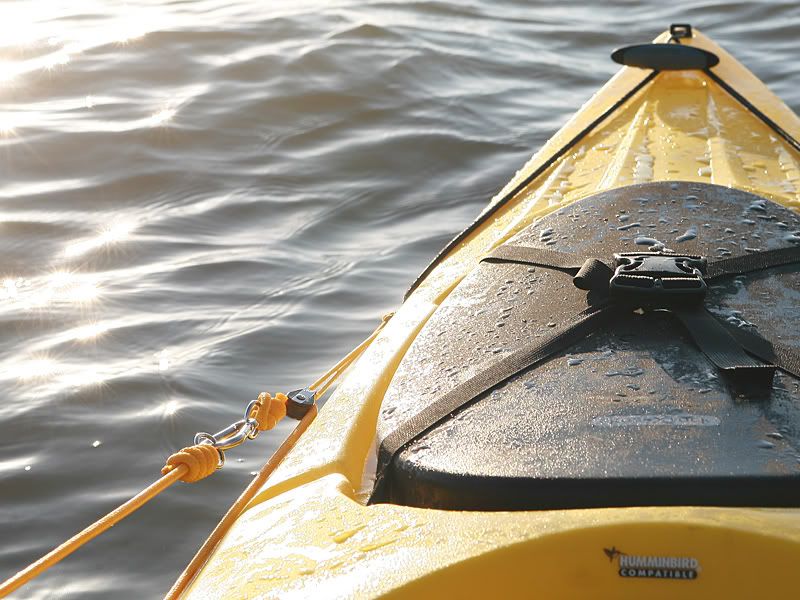
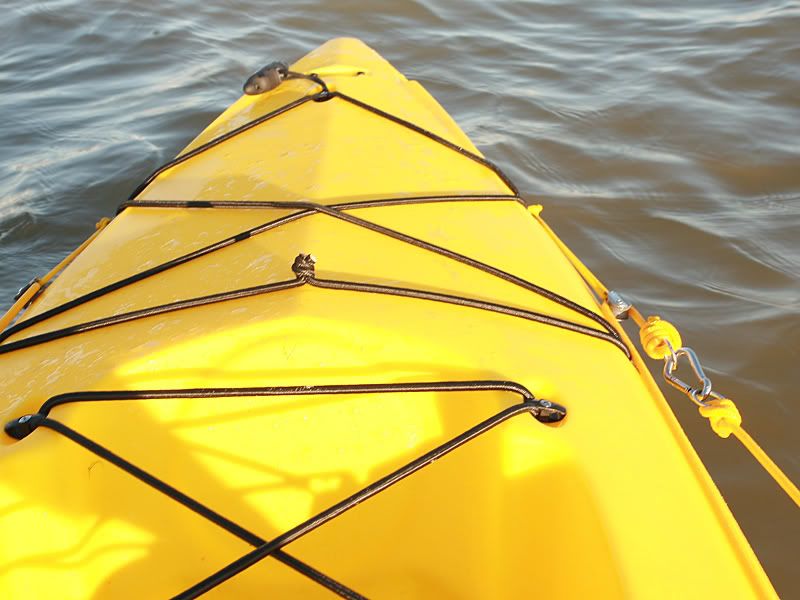
The trident is superbly designed for setting up an anchor trolley. There are rigging points all over the place and this allows for an easily self-manufactured full-length anchor trolley system. The first thing to do is remove the two pieces of cord running through these fittings and set aside for future use if required.
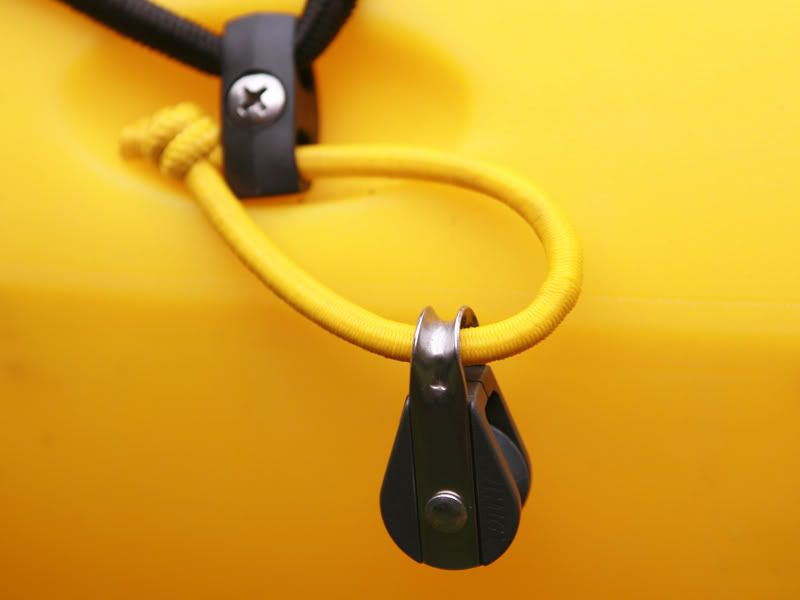
At the furthest rigging points fore and aft I tied a 25cm piece of shockcord into an overhand loop which hold at the end the pulley block. The shockcord gives slack when the swell raises the boat in the water and tightens the lines when not in use.
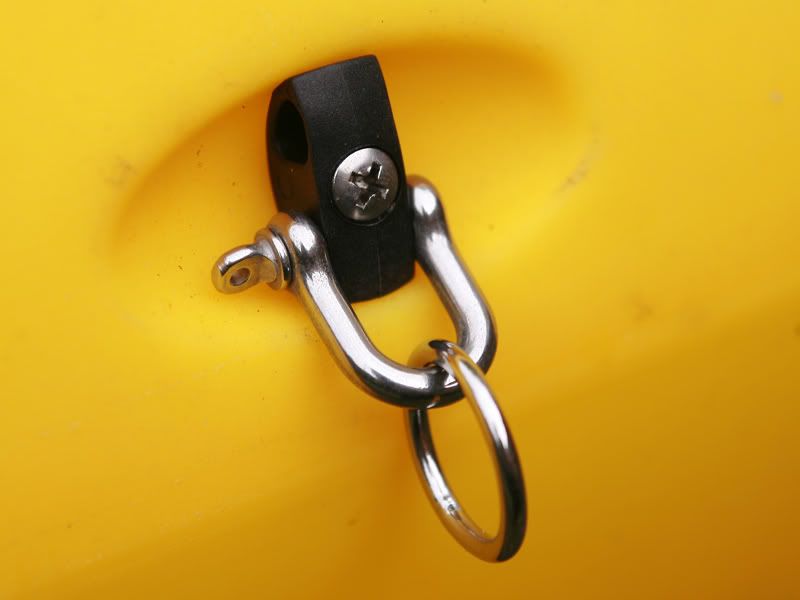
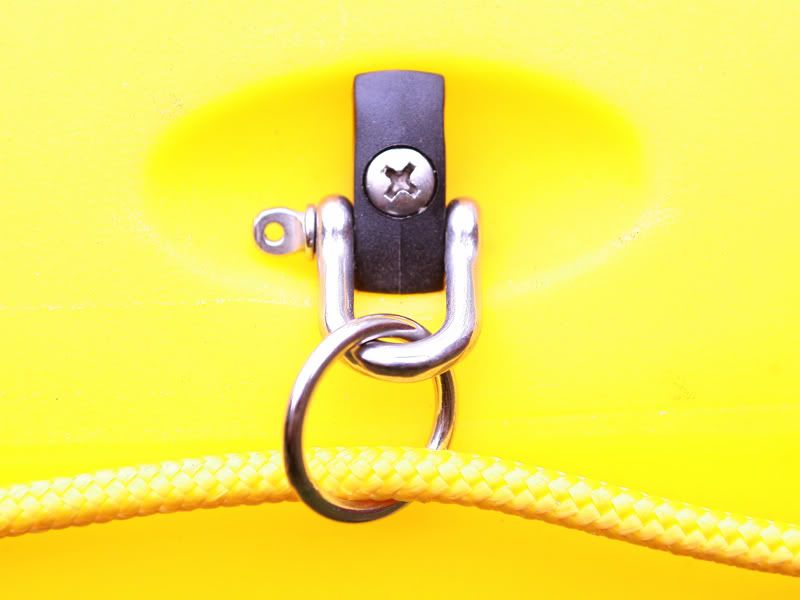
Next I chose points behind and in front of the seat area and attached Bow shackles and O-Rings to these to form running eyes for the side of the rope unused by the anchor carabiner. These allow free passage of the rope without any resistance on the rope but keep the lines below the level of the cockpit and therefore tidier and safer.
I then ran the cord through these eyes
and through the pulley blocks
The final stage was to tighten the cord and tie off both ends of the rope to the remaining O-Rings and fit the carabiner between them.
The whole process took maybe 20 minutes and involved no drilling and no tools other than a screwdriver to loosen off the rigging points, scissors to trim loose ends, pliers to pull them really tight and a lighter to melt the frayed ends. Very simple and easy to do.
That done I turned my attention to the hatches, and those bits of string that held them once the clips had been released. First I tackled the bow hatch and after removing the thin line I tied an overhand loop into one end of a piece of shockcord and fitted it through a convenient pad eye.

I then widened the hole in the hatch and pushed the other end of the shockcord through, finishing with a double overhand knot.
With the hatch closed I know had a more substantial hatch keeper, and as it was tied in this way I can push the slack into the hatch through the hole, which is smaller than slack bungee.
I did the same for the rod pod, but turned the hatch the other way around, cup holder away from me as I intend using it for something other than cups of coffee, which I pour and drink straight away so as too avoid missing bites or having it get cold. I again removed the small line and widened the hole enough to get the shockcord through, again tied into a double overhand knot, terminating on the outside of the hatch.
I then made a hole on the inside of the hatch lip which I threaded shockcord through – this lip being turned over and not actually having an ‘outside’ edge. The line had originally been tied to a strap.
Once again, a nice tidy and strong solution which could have all slack pushed out of the way.
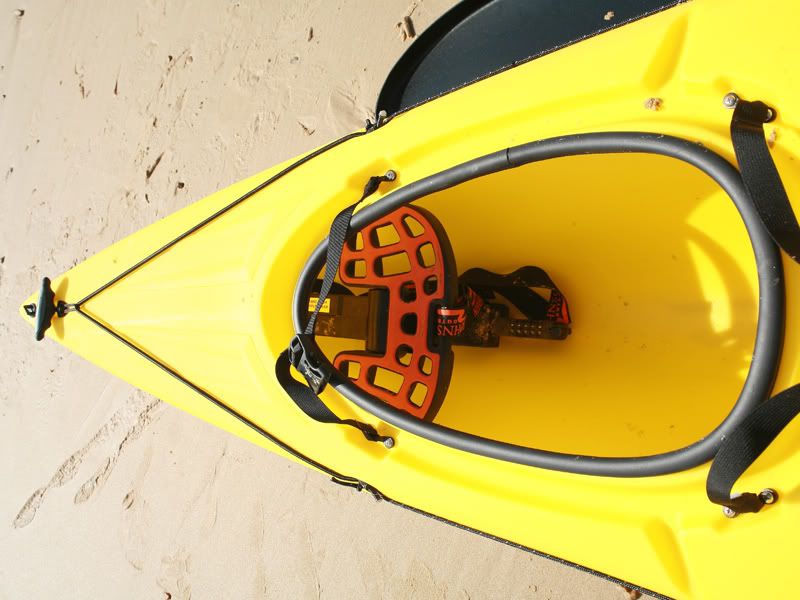
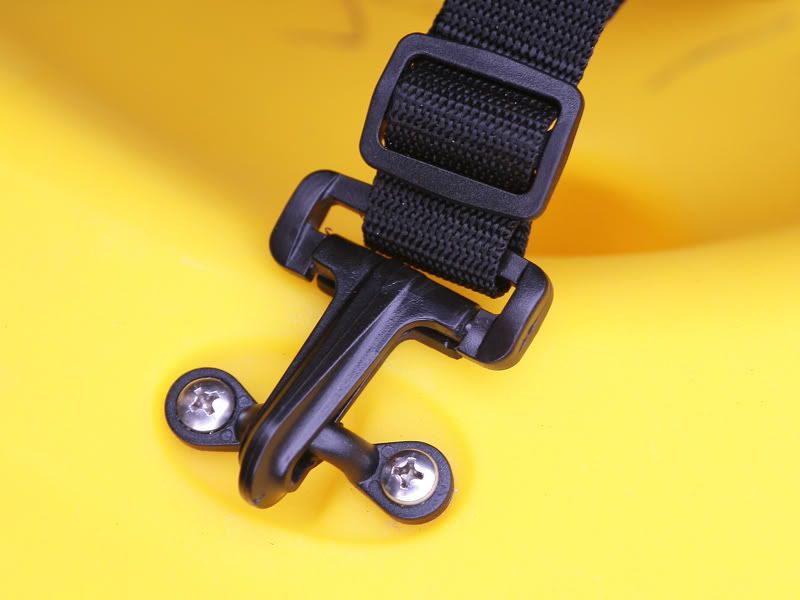
Third job of the day was not really a normal consideration. I’m a tart and as such I don’t like the brass swivel clips fitted to the seat backs. On my 15’s I replaced these with stainless steel carabiners as they were smaller and looked neater, and didn’t tarnish. However, this time I decided to save weight and also make the yak quieter by using plastic clips, which should also reduce wear and tear on the pad eyes.
While fitting these it reminded me of something. With my Prowler 15 not handling the surf too well (it’s designed for something completely different) I had often considered buying thigh straps but not gotten around to it. However, I had two long straps with these clips at each end which were on lighting stand holdalls. Were as in past tense. They are now temporarily installed so I can finally see whether thigh straps would be a useful addition for my kayaking as anything that keeps me from getting wet at the end of a trip is surely worth having.
The trident, as I said, has plenty of attachment points and I assume that the ones I used were in fact designed in to take thigh straps.
A further note regarding the fittings on the Trident. Pad eyes have recesses underneath them now which gives more room to use behind them and this is a minor thought but major improvement. I am continually finding these clever little ideas on the Trident and it speaks volumes.
I read this book recently that had on the back the text: “Five red cars means it’s going to be a SUPER GOOD DAY.” I wasn’t quite sure what that meant until today - today being the day that a brand-spanking-new yellow Trident came home with me.
I’d read the forums and looked at the photographs and so on and decided that I would start a thread on mine, from the start until, well, whenever it’s finished. So let us start at the beginning:
Just like Christmas, a parcel, all wrapped up, was lying on the floor for my attention. A 15ft long parcel. A couple of minutes later and this was all on the floor around it and I got my first real view of a Trident. It was love at first sight! Initial thoughts were that it looked solid, purposeful and well thought out. Closer examination brought out even more extra details and I realised that it wasn’t another kayak that had been turned into an angler edition by merely adding some flush mounts but something that had actually been designed for the sole purpose of being used for chasing fish all day long, comfortably, ergonomically, safely and thoughtfully. It just looked ‘right’. Once safely strapped to my roof bars it was time to see how it handled being driven as I took it home on the dual carriageway, slowly increasing in speed to 70mph or so – steady as a rock, no flexing or additional noise. It passed the first test and I’d happily go on a decent run with it on the roof.
Back home I grabbed a C-Tug, a PFD and my camera and unstrapped it from the roofbars, proper reviewing starts here.
Immediately noticeable was the weight – officially 1.8kg more than the Prowler 15 Anglers I’m used to, weighing in at 27.2 KG’s (60lbs instead of 54lbs in old money). I’m no nine-stone weakling but no weight-lifter either and I’d say that the average man in the street would be quite able to car top it solo, but it’d take effort. That said, the load balance seemed better spread than the 15 and it was easy enough to manoeuvre.
Once on the C-Tug and tightened up I took hold of the rear toggle handle and began to haul it down to the beach. Again, the extra weight was clearly noticeable but at no time did it become a struggle. Here I took heed of the first change in the fixtures. The toggles aren’t attached to their own point as on the 15 but instead go through the two holes and around a shock-cord deckline. This has the effect of pulling tight any slack and thus making the pulling of the kayak more steady and I would imagine it also keeps rattles down. The following photographs show what I mean, but using the forward toggle:
On the way down to the beach I liked that, and found it well thought-out and useful. I changed my mind, however, on the way back when I used the front toggle to pull it home. SO different. Maybe it’s tighter pressure on the shock-cord or something but it was uncomfortable for me. This was compounded by having the drain plug in the way as well and by the time I’d returned home I had changed my tune completely. It was no major job to undo the various fixtures and cords and re-thread them though and I now have the toggles hanging loosely with the bungee pulled tight – and the pressure on the toggle will be the same with or without extra’s placed under the bungees. Incidentally, the drain plug appears to be made from a stronger and more hard-wearing plastic than that on my 15.
Once at the beach I unloaded and dragged it into position without the trolley. It moves easily enough on wet sand. I then took the following general shots of the whole boat:
Front quarter, showing the bow:
A higher angle to better show the general layout of hatches, tankwell and seat area:
The rear quarter and a view of the rudder fixings and rear bungee area
A side view which draws attention to the more angular look of the moulding than on the Prowler 15:
Starting from the front you have the drain plug and toggle handle, both already mentioned:
Next comes the forward hatch which is of a less flexible and more sturdy feel than that on the 15 and which feels a lot more secure ‘in-place’, giving an impression of water-tightness. It felt snug and secure.
(Photograph to follow)
The hatch is then secured by the crosslock buckle which is again very secure and inspires confidence. It also appeals visually and ergonomically – and doesn’t need two handed operation or 4 straps to be put into place.
Now, on the 15 there is an extra strap on the front of the hatch which secures it so it can’t fall off. OK have opted instead to put a thin cord through a small hole in the side of the hatch and tie this off to a bowline. Effective and lightweight for sure and a minor detail but it doesn’t quite match the quality of the rest of the design – it looks like an afterthought, but does the job.
But what a hatch! It’s HUGE! Until you try to put stuff in you don’t appreciate quite how different it is. I usually have to put my C-Tug in methodically to get everything to fit and balance out after stripping it down into 5 parts. The Trident will take it in 3, the two wheels went to the rear and the crossmembers and supports stayed in one piece and pushed up to the bow. This had two immediately obvious advantages over the 15. Firstly, the balance would be better as the forward pieces remained upright and wouldn’t move about loosely. Secondly, by shifting the wheels backwards the nose would be lighter and thus more buoyant. Furthermore, I still had loads of room and could easily add a buoyancy bag or dry bag full of clothes. Perhaps even both.
From inside, looking backwards:
Next up was the sonar shield and fishfinder well. To me this is a very welcome addition – whenever I launch a wave goes over the bow and hits the back of the finder. The pressure of this is greater than that which the waterproofing is generally rated for and thus condensation becomes an issue on the screen in short order. I don’t see a problem now – the finder itself can be folded flat with the shield over the top and clipped down, streamlining everything and keeping the rear dry (ish) and away from excess pressure. The shield then flips up for actual use and still shields the back of the unit as well as reducing flare. Shock cord acts as a spring to keep it pushed down onto the finder itself too, in position and not flapping about in the wind.
More thought has been put into this too. Drainage slots are a featured part of the well and these also allow the transducer cable to run down to the transducer scupper making the addition of a hole for running the transducer inside the hull unnecessary. This is one less area for a leak and also means the transducer will give more accurate information on water temperature and optimum performance as a finder.
The transducer scupper hole, from underneath, is obvious in that it is far larger than the normal ones. It’s actually quite deep and formed in a teardrop shape which I presume to be for enhanced aerodynamic flow of water as the standard scupper holes also have a teardrop-shaped surround. (Please note that the photographs of the scuppers are not at the same magnification and are thus not in scale with each other).
These scupper holes are in the footwells. These have been redesigned and are self-draining. In the Prowler 15 I would always have water retained between the ridges but the Trident has gaps for this to flow through and down where it does drain away very efficiently. I know they work because although I still got a lap full of water going out through surf but it all disappeared. A great improvement and one which wuill be of added benefit when fishing in the winter.
Next comes the Rod Pod (or Cod Pod with a bit of luck!). This is the feature that first impressed me when the Trident was announced, and which I had admired on the Kaskazi Dorado. On the 15 I had always wondered what I would do with a decent haul of fish that I wanted to keep - chance would be a fine thing – but now this is no longer an issue. I can now treat fish like beer and send them straight down the hatch! Again, the cover is solid and not too flexible and fits snugly. It is also held down by a couple of straps (though not a Crosslock this time, which would be useful for opening one-handed but not so secure in the event of a capsize).
Opening up there is a tray covering half the length. This can be moved around and will prove to be ideal for my use by holding bait where it can be kept dry and secure (ie ragworm/lugworm wrapped in newspaper). Other small items could be stowed here too, or food, and in my opinion it is a useful addition.
Take the tray out and the entire interior of the hull is accessible. The length and width – not to mention the position - of the hatch itself will make stowage of tackle a piece of cake. No more messing around with rod clips or paddle-keepers or risking flushmounts or turning rod holders around and lowering them, no, even rods of a good length should go in with no trouble. Not only that, any heavy stuff put there is close to the centre of the boat and thus won’t affect the ride adversely. As someone who doesn’t use a crate but who wants to be able to stow things away this is ideal. As a photographer as well as an angler I also now have the option of being able to take a decent SLR with me, where I can get to it at will, without the danger of damage instead of just relying on a compact in the PFD. Hell, I could even get my Crown Graphic in there! OK have just designed the first truly photographer friendly yak!
Oh, the hatch cover also has the bit of string attached.
So, from the seat forwards you have the following; hatch, sonar shield, hatch, bowline, toggle, carry handles, pad eyes and rudder peg fitment area:
At the bottom of the photograph above you will see a ‘contour’. This is the front of the seating area. Looking the other way you can see the overall shape, with a build up at the front and a slope to the rear (and scupper holes). Thus much of the shaping for a good seating posture is already built in.
Add the new high-backed Comfort Plus Seat Back and you’re away. Now, there are many options for seats and supports in the OK range and while I found this to be comfortable and with good support in the short time I was afloat today I also found the Basic Seat Back fine for half-day paddles in the Prowler 15. This came a lot higher up though and should make heavy paddling easier.
The seating area:
The paddle keepers are almost the same as those on previous kayaks but have the addition of tabs that make it a bit easier to grab hold of them, especially with gloves. Nice attention to detail that.
Behind the seat are, of course, the flushmounts. These are unchanged and useful for both rod storage on the water and trolling lures from as well as fishing from if sitting side-saddle.
The rear tankwell is next. Proportionally this appears to take up less area than that of the 15, having thicker sidewalls, but does in fact appear to be larger. However, it has been extensively redesigned and a lot of thought has been put into it. No longer is there a flat tray with 2 scupper holes – this is shaped and channelled and the scupper holes are actually lower than the main body and thus get drained into. This may not seem that big a deal but I for one will find it a bonus.
Something that I also liked was the central ‘dog clip’ attachments on the shock cord. Bungees can go everywhere when unhooked from buttons but this will all stay in position and the clips can no doubt be attached to crates by those who use them. There is also some bungee cord across the narrow piece of the tankwell just behind the cockpit. I can’t work out it’s purpose (nor, actually, the narrower section as it happens) but if it does get in the way it is easily removable. The pad eyes are sure to come in useful anyway.
From the other end:
Right on the stern there is more shockcord formed into a small cargo web. Handy to have but most likely not something that will be used much.
That’s the end of part one, what it looks like and how it’s laid out. My personal opinion is that it’s very well designed throughout with only the odd minor niggle as already pointed out. It looks the business and appears to be a capable kayak.
But don’t just take my word for it:
Part two will deal with my initial experiences on the water as I took it for a short test drive.
Rigging the Trident Part One.
This is the first part of the rigging of my Trident ready for when it gets out on the water for a fishing trip.
First job was to fit anchor trolley systems, on both sides to give me the choice when at sea. A visit to the local chandlers saw me sourcing what I needed and the photograph below shows the components for ONE trolley, everything being doubled and mirrored on the opposite side and I will write this from the point of view of a single trolley from herein to avoid confusion. Prices in Sterling, totalled for full quantity of each item.
The components are as follows:
7m of 7mm Yellow nylon cord - £4.90
1m of 4mm Yellow shock cord (cut into 4 pieces of 25 cm each) - £0.70
2x Rino Pulley Blocks - £7.00
4x 3x20 Stainless Steel O-Rings - £1.60
2x 5mm Stainless Steel Bow Shackles - £1.40
1x 8mm Stainless Steel Carabiner - £3.00
Total Price (one side) - £18.60.
The trident is superbly designed for setting up an anchor trolley. There are rigging points all over the place and this allows for an easily self-manufactured full-length anchor trolley system. The first thing to do is remove the two pieces of cord running through these fittings and set aside for future use if required.
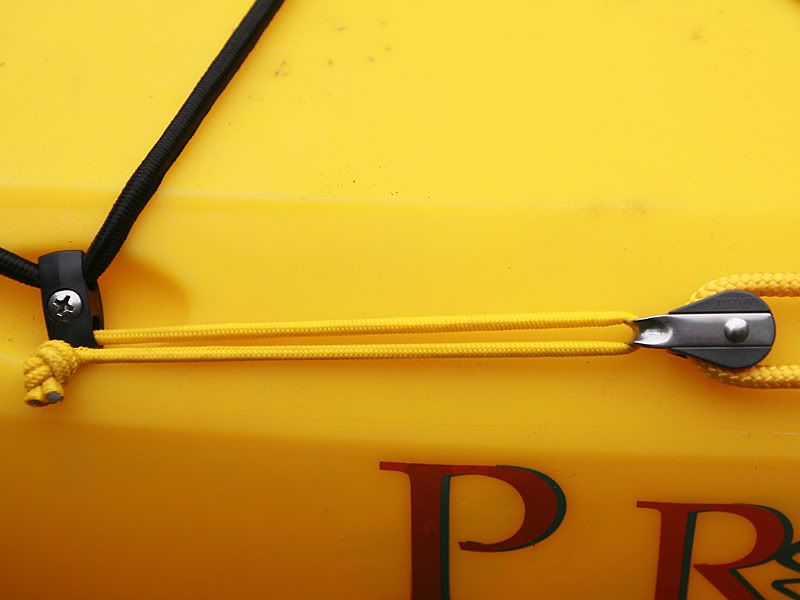
At the furthest rigging points fore and aft I tied a 25cm piece of shockcord into an overhand loop which hold at the end the pulley block. The shockcord gives slack when the swell raises the boat in the water and tightens the lines when not in use.
Next I chose points behind and in front of the seat area and attached Bow shackles and O-Rings to these to form running eyes for the side of the rope unused by the anchor carabiner. These allow free passage of the rope without any resistance on the rope but keep the lines below the level of the cockpit and therefore tidier and safer.
I then ran the cord through these eyes
and through the pulley blocks
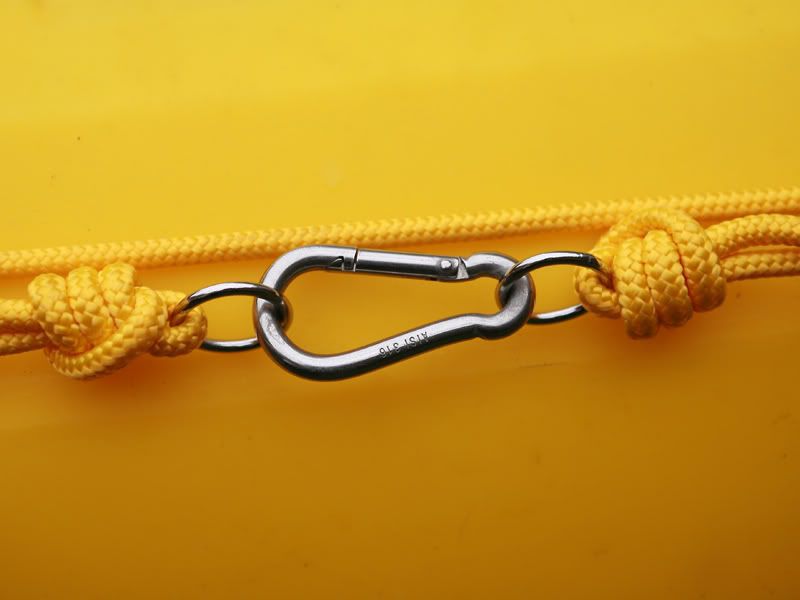
The final stage was to tighten the cord and tie off both ends of the rope to the remaining O-Rings and fit the carabiner between them.
The whole process took maybe 20 minutes and involved no drilling and no tools other than a screwdriver to loosen off the rigging points, scissors to trim loose ends, pliers to pull them really tight and a lighter to melt the frayed ends. Very simple and easy to do.
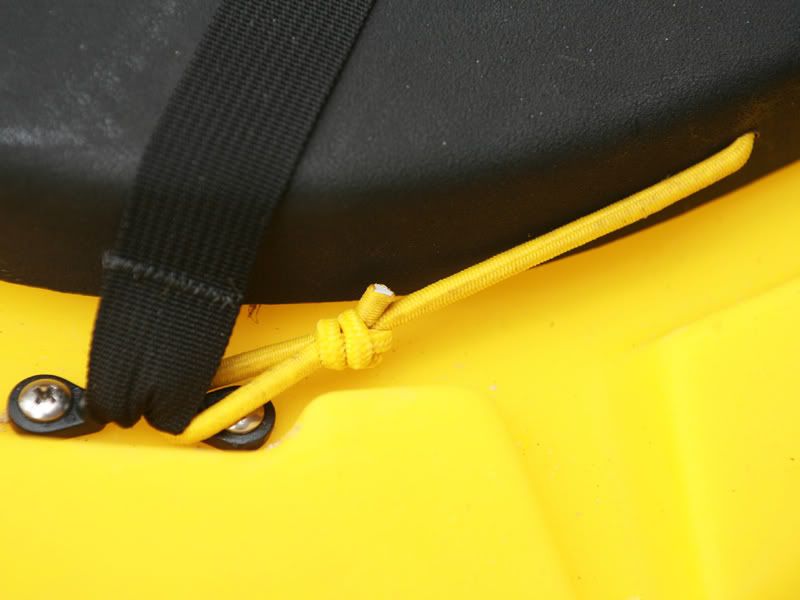
That done I turned my attention to the hatches, and those bits of string that held them once the clips had been released. First I tackled the bow hatch and after removing the thin line I tied an overhand loop into one end of a piece of shockcord and fitted it through a convenient pad eye.
I then widened the hole in the hatch and pushed the other end of the shockcord through, finishing with a double overhand knot.
With the hatch closed I know had a more substantial hatch keeper, and as it was tied in this way I can push the slack into the hatch through the hole, which is smaller than slack bungee.
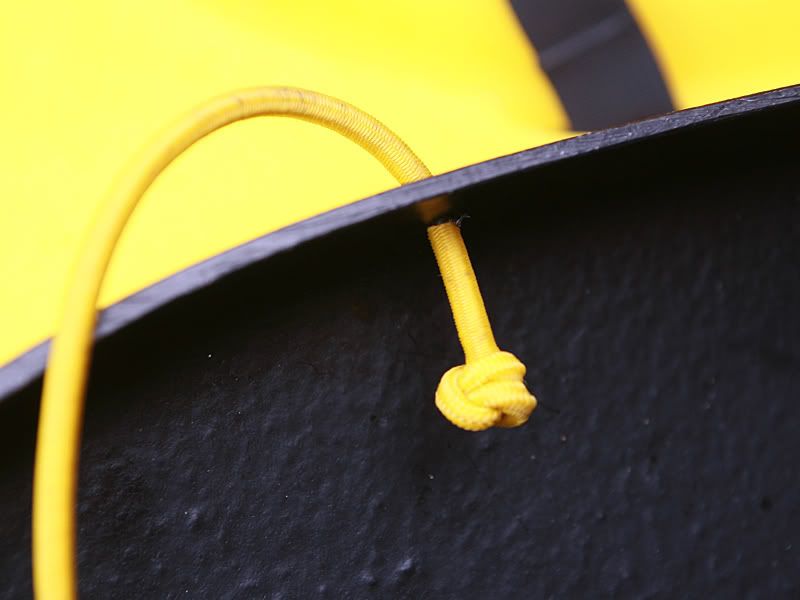
I did the same for the rod pod, but turned the hatch the other way around, cup holder away from me as I intend using it for something other than cups of coffee, which I pour and drink straight away so as too avoid missing bites or having it get cold. I again removed the small line and widened the hole enough to get the shockcord through, again tied into a double overhand knot, terminating on the outside of the hatch.
I then made a hole on the inside of the hatch lip which I threaded shockcord through – this lip being turned over and not actually having an ‘outside’ edge. The line had originally been tied to a strap.
Once again, a nice tidy and strong solution which could have all slack pushed out of the way.
Third job of the day was not really a normal consideration. I’m a tart and as such I don’t like the brass swivel clips fitted to the seat backs. On my 15’s I replaced these with stainless steel carabiners as they were smaller and looked neater, and didn’t tarnish. However, this time I decided to save weight and also make the yak quieter by using plastic clips, which should also reduce wear and tear on the pad eyes.
While fitting these it reminded me of something. With my Prowler 15 not handling the surf too well (it’s designed for something completely different) I had often considered buying thigh straps but not gotten around to it. However, I had two long straps with these clips at each end which were on lighting stand holdalls. Were as in past tense. They are now temporarily installed so I can finally see whether thigh straps would be a useful addition for my kayaking as anything that keeps me from getting wet at the end of a trip is surely worth having.
The trident, as I said, has plenty of attachment points and I assume that the ones I used were in fact designed in to take thigh straps.
A further note regarding the fittings on the Trident. Pad eyes have recesses underneath them now which gives more room to use behind them and this is a minor thought but major improvement. I am continually finding these clever little ideas on the Trident and it speaks volumes.